Organizing Publication and Submitting Papers to Publisher
Arranging papers into a Table of Contents and Submitting to Publisher
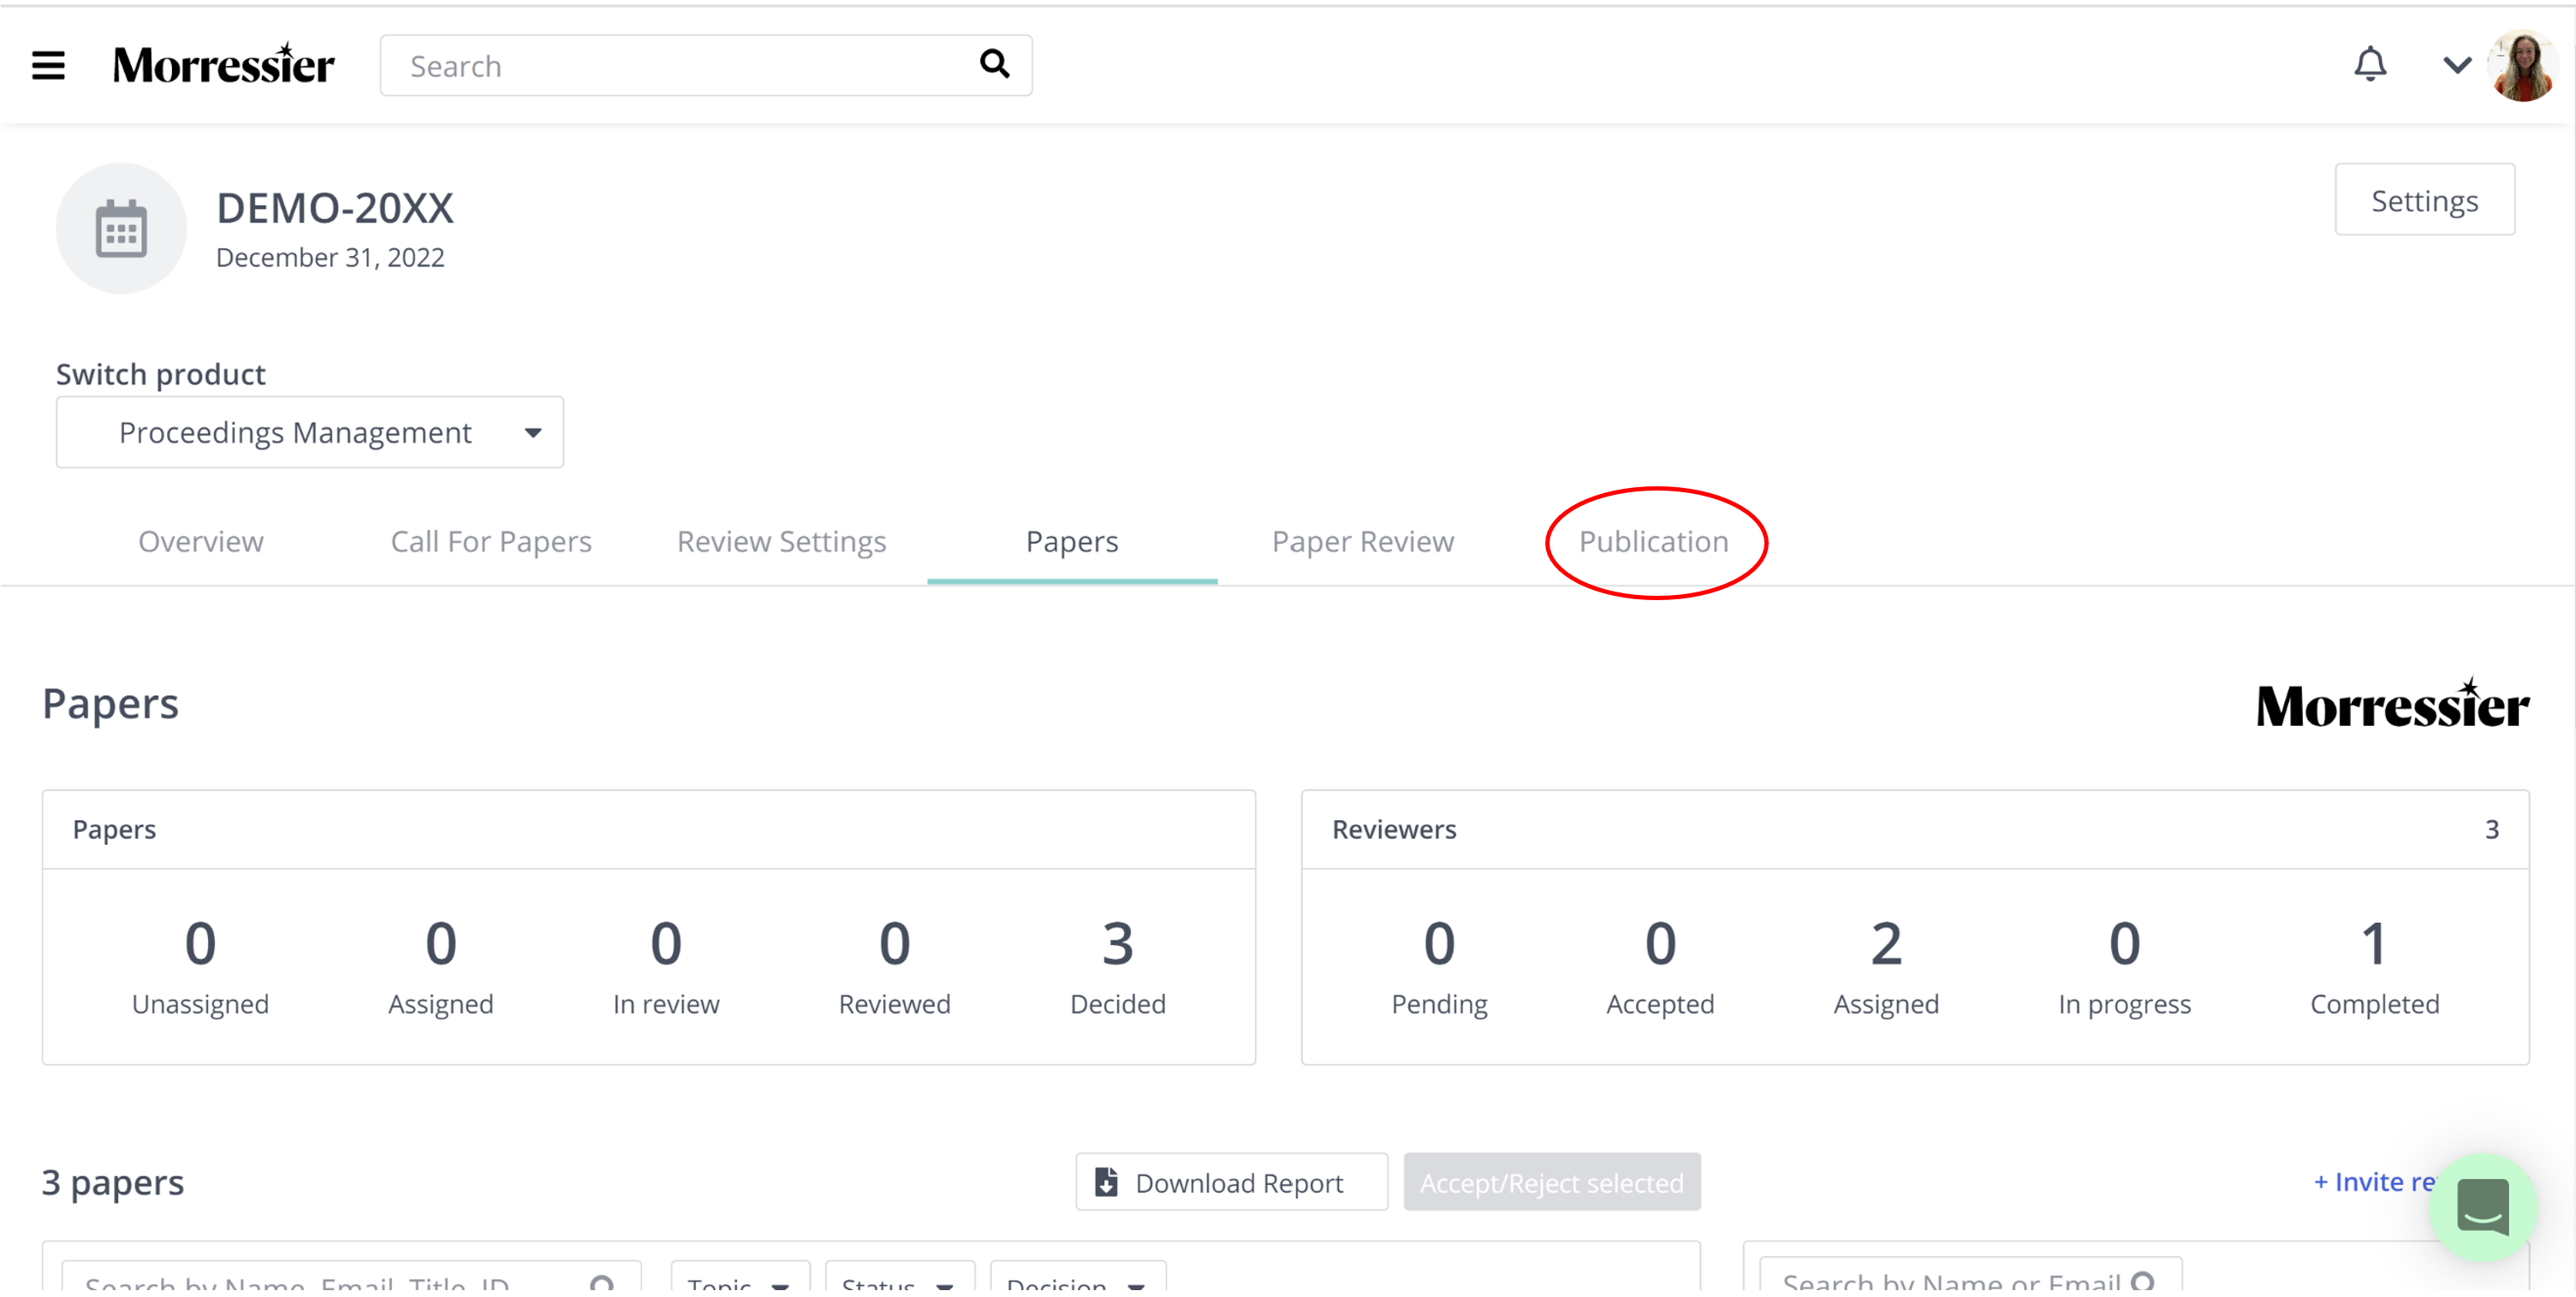
Once your peer review process has finished and you have accepted all the papers you would like to include, select the Publication tab.
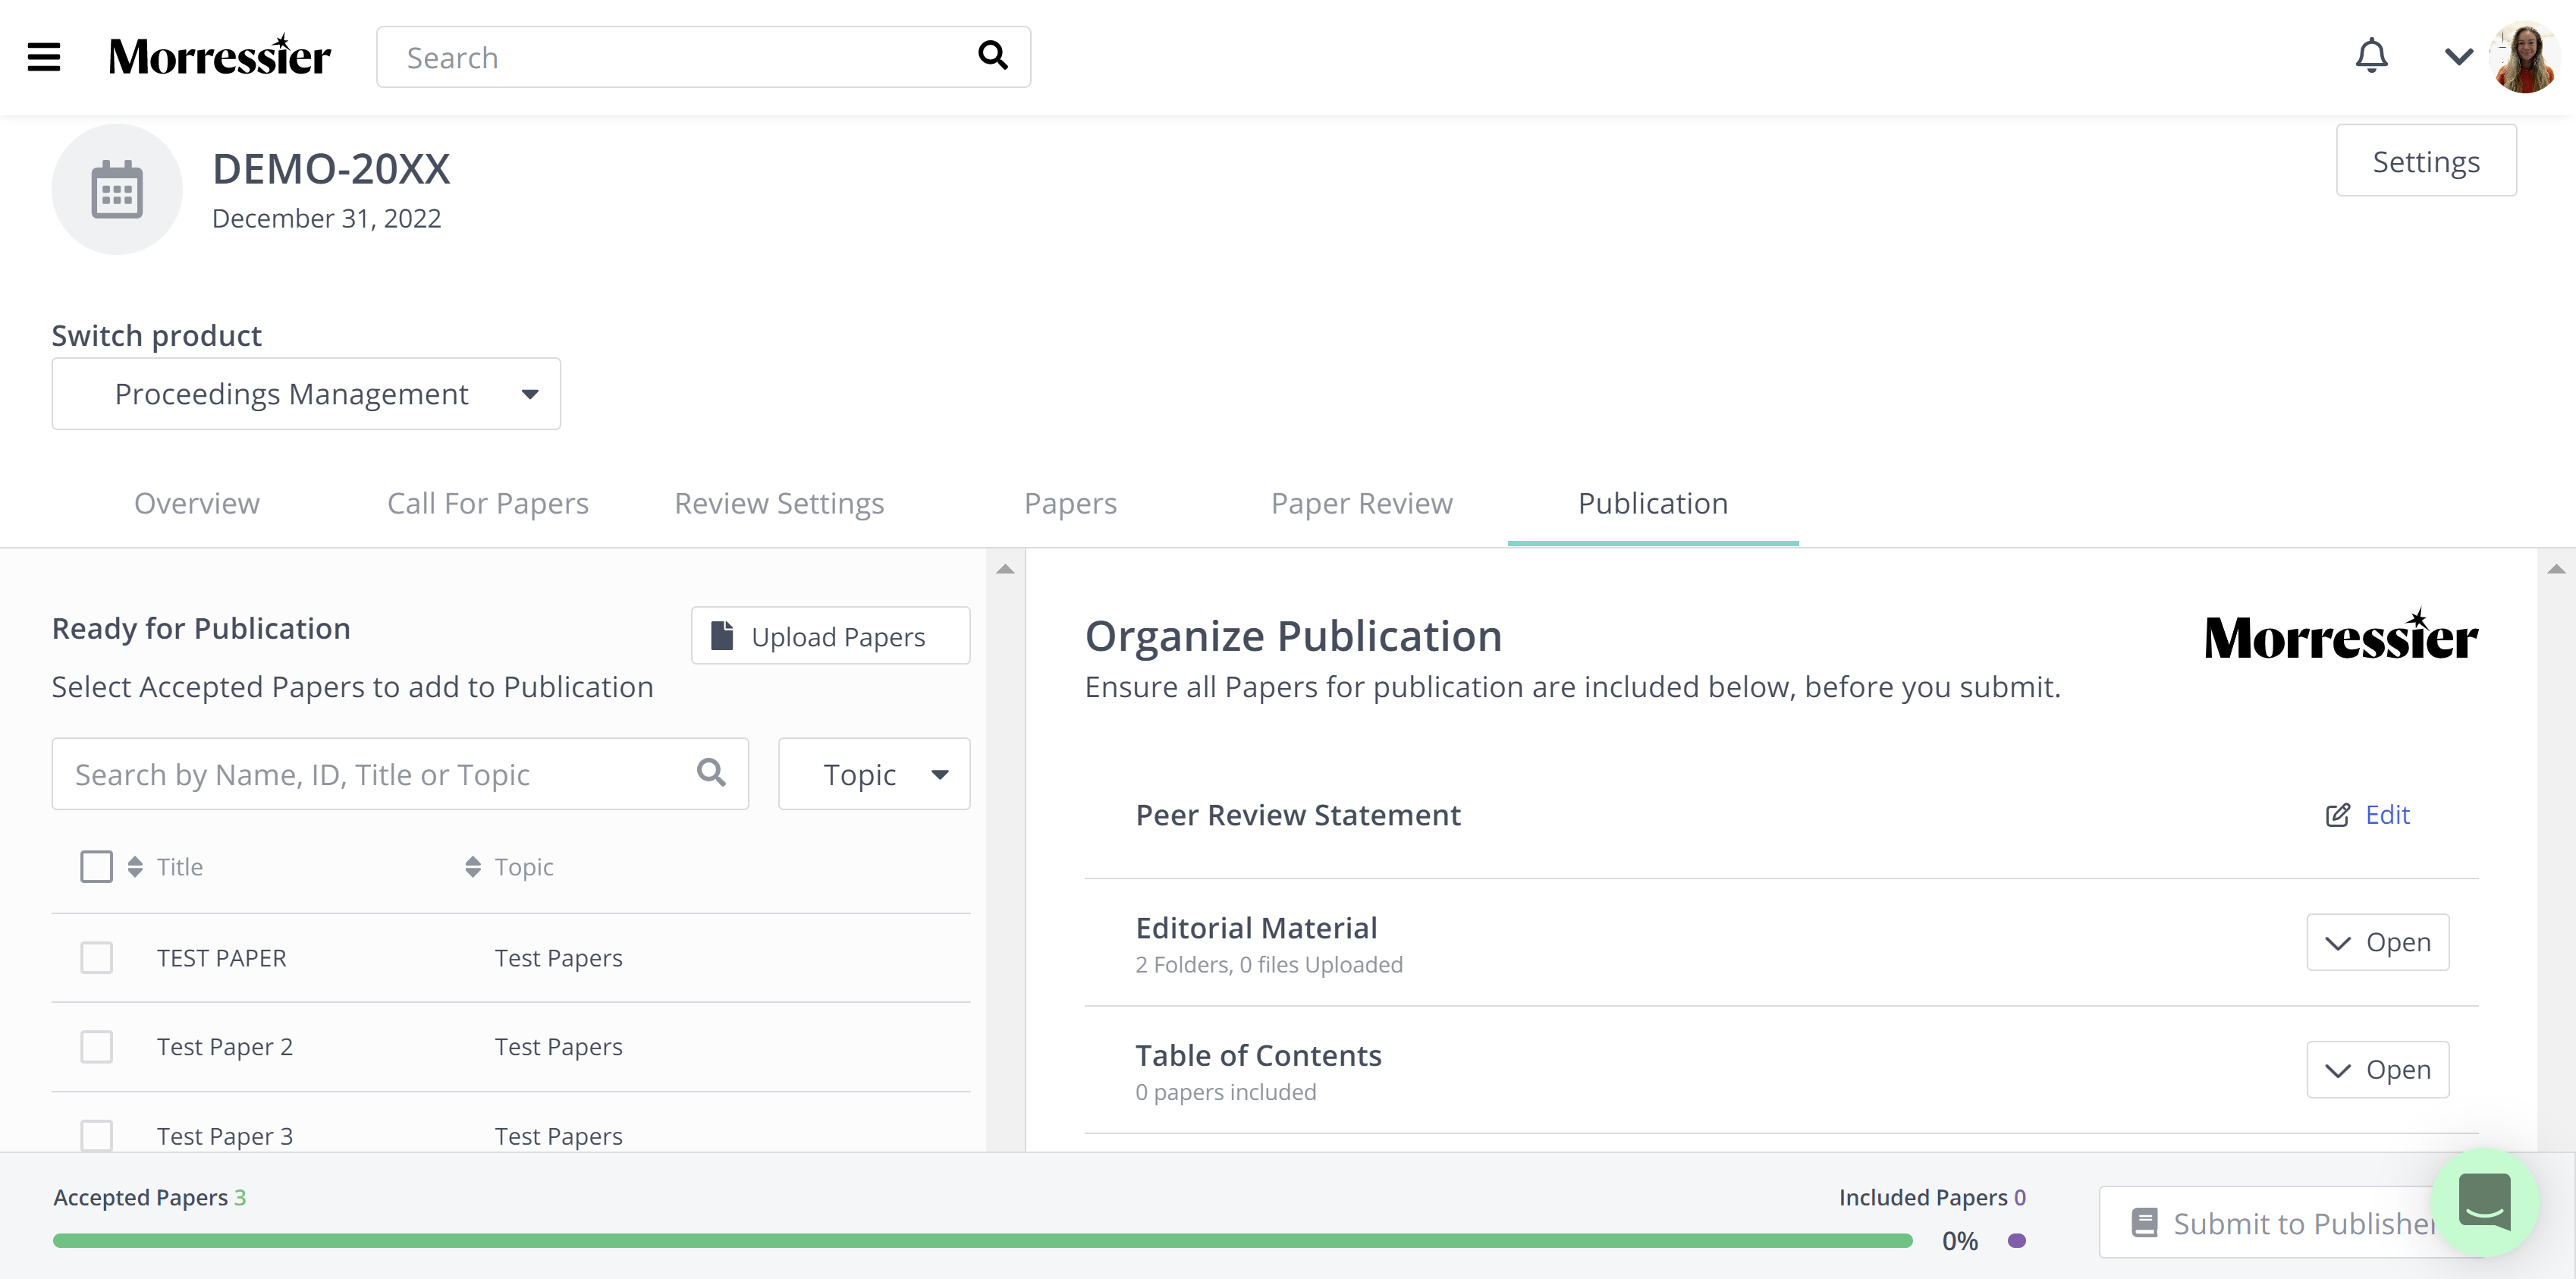
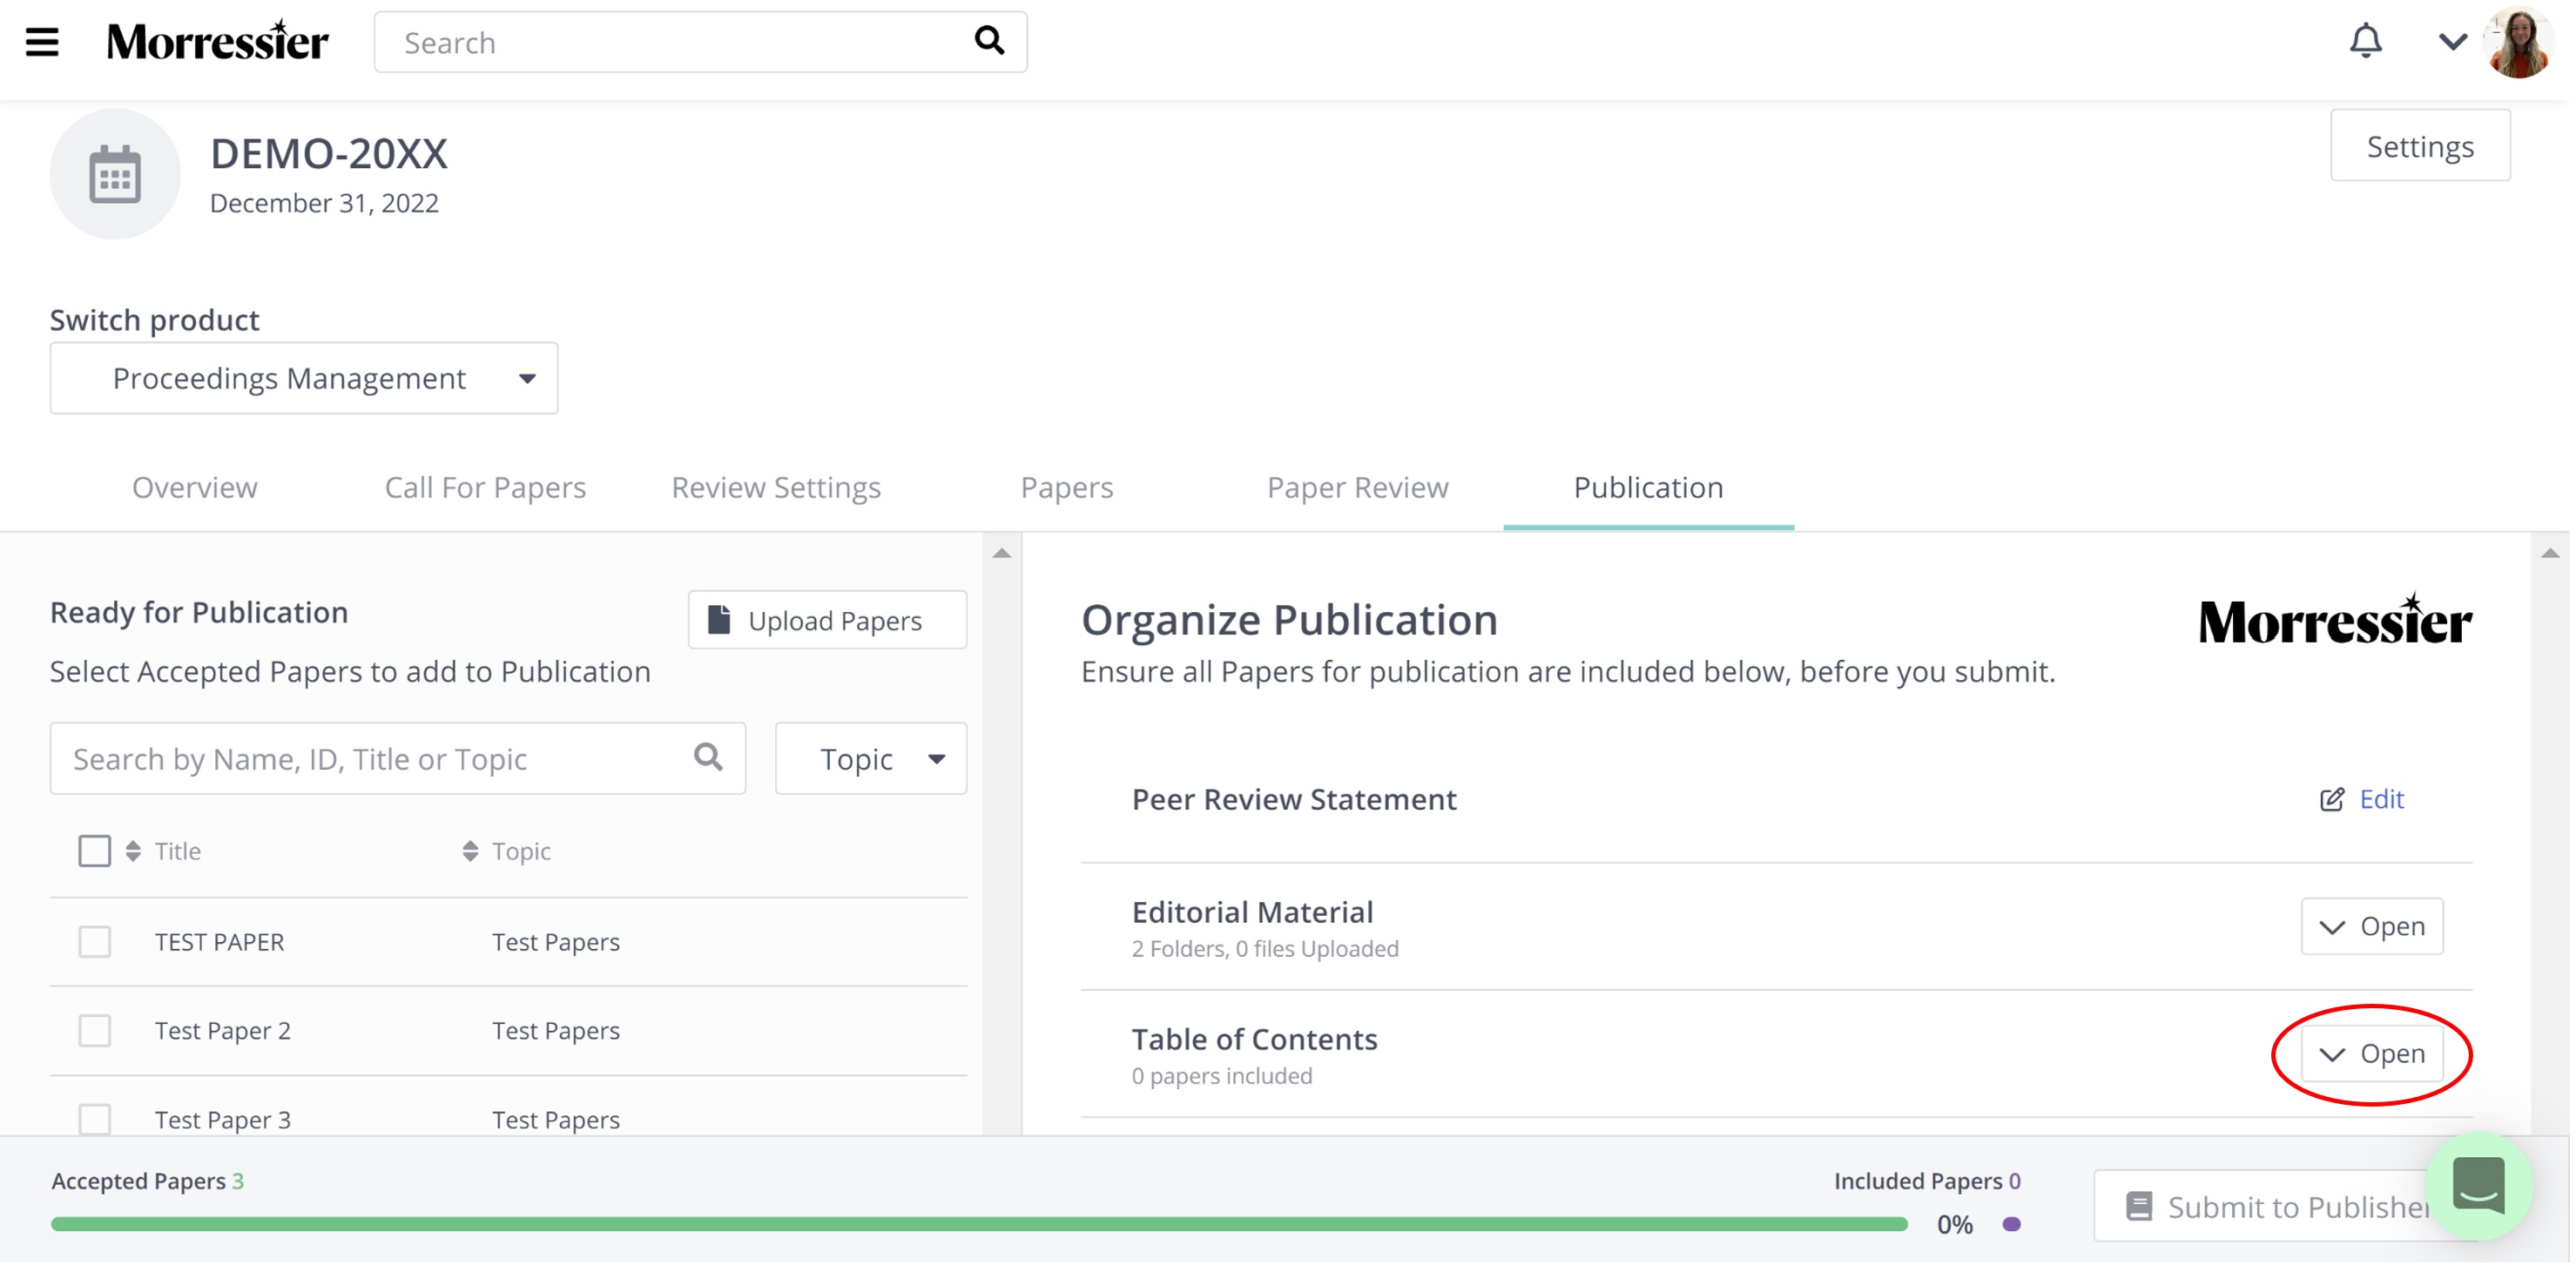
Here, you can set up sections for your Table of Contents by clicking the drop down box titled 'Open':
Here, you can click '+Add Section' to add your first Headline in your Table of Contents:
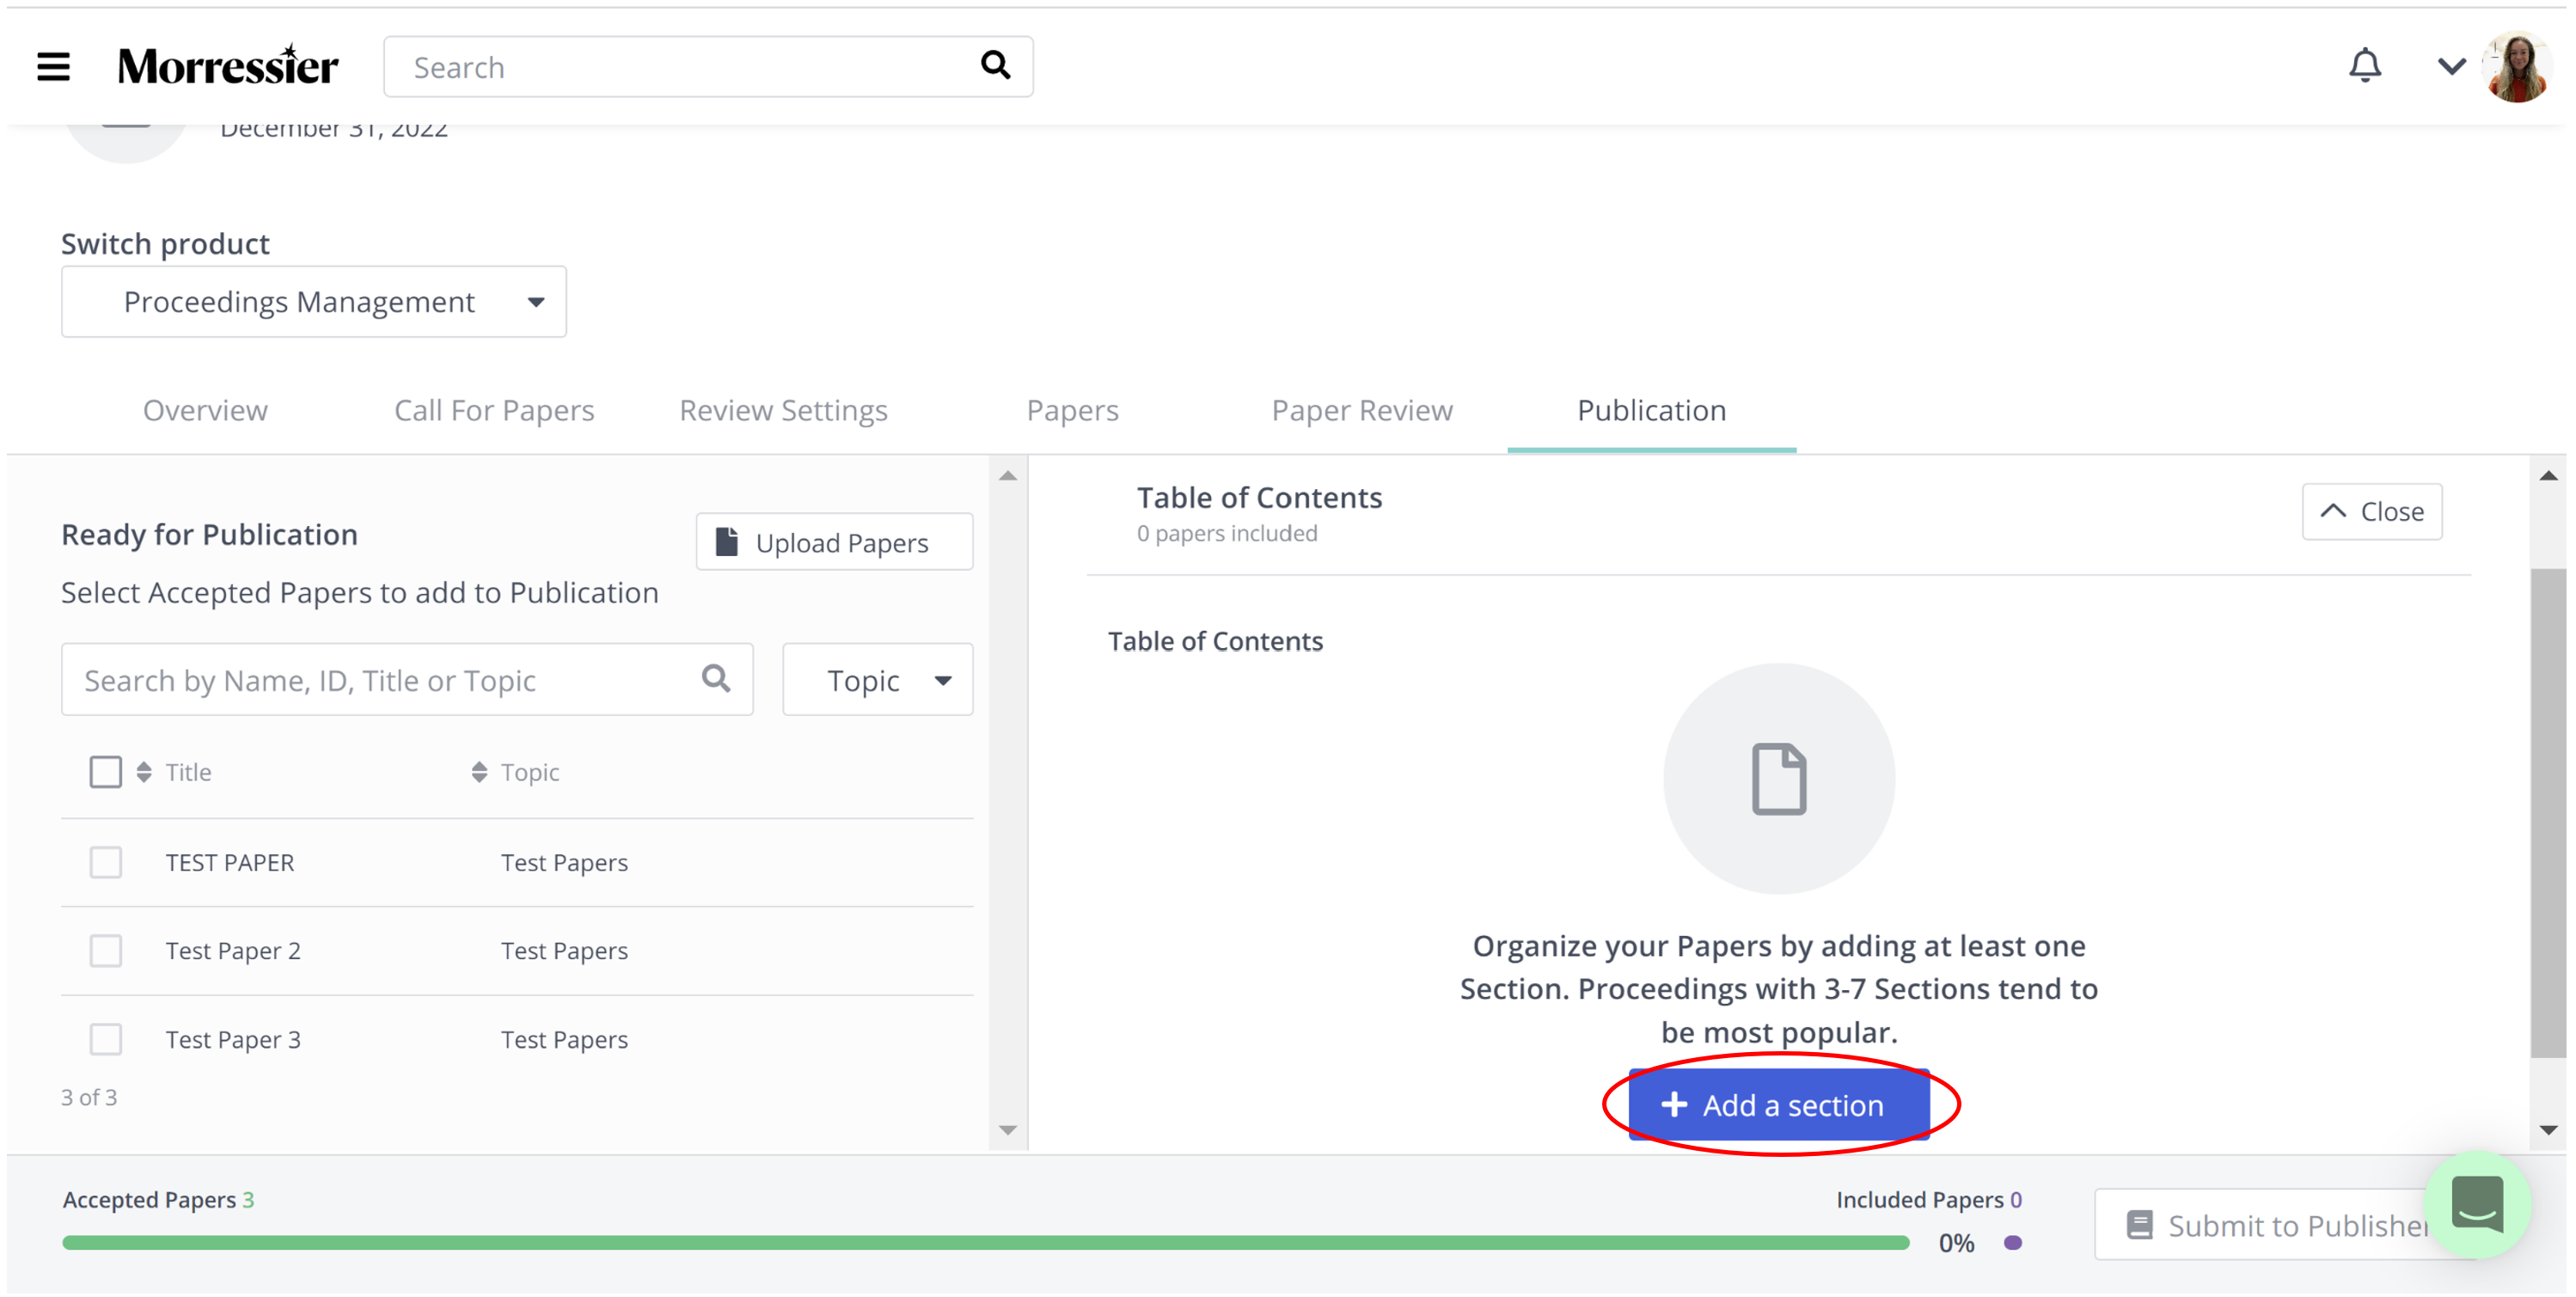
A box will appear asking you to give a name for the section.
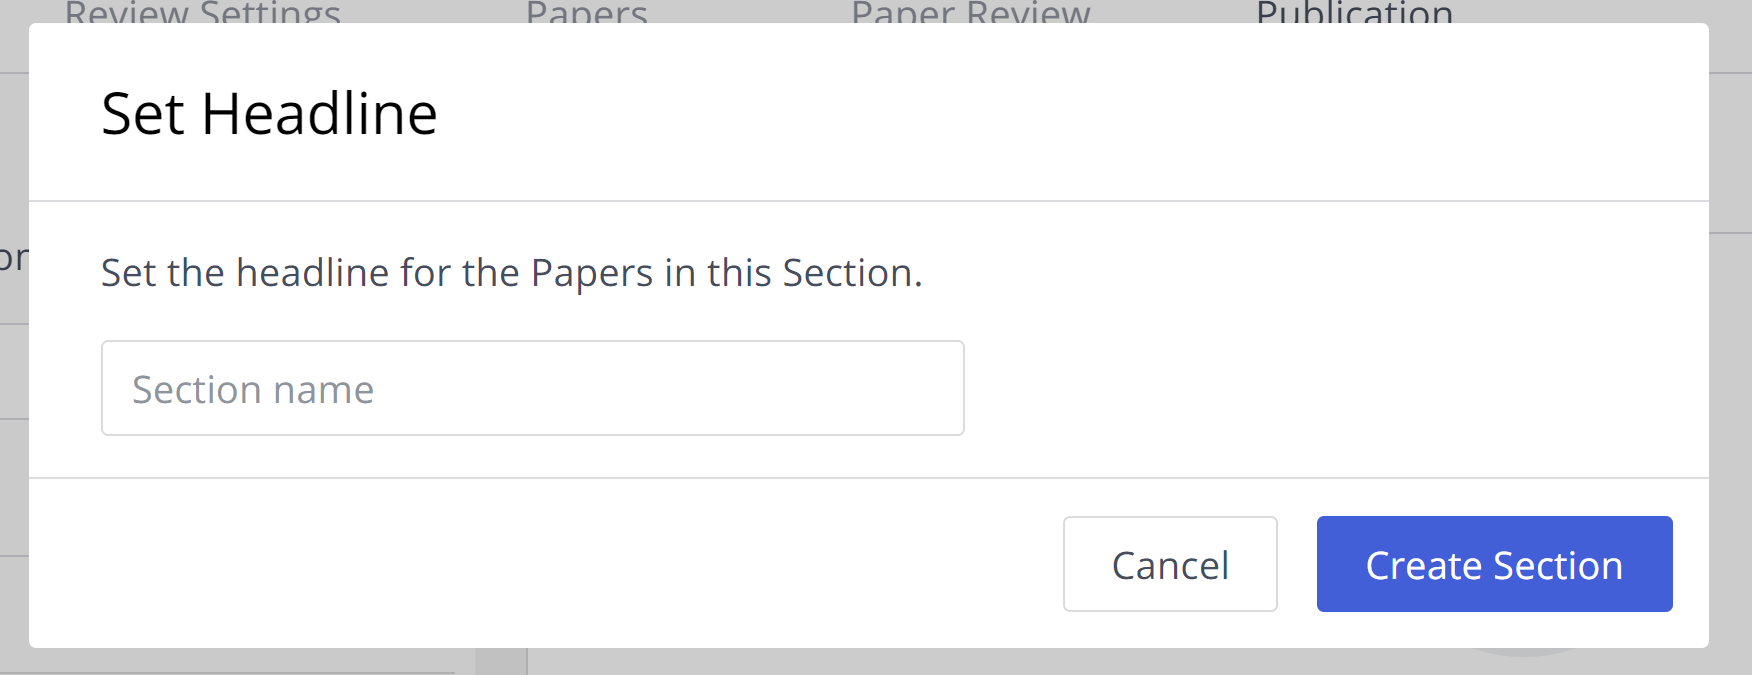
Things to note:
-
For small volumes, a single section called Papers is sufficient.
-
It is recommended to set up several sections for volumes with more than 50 or so papers.
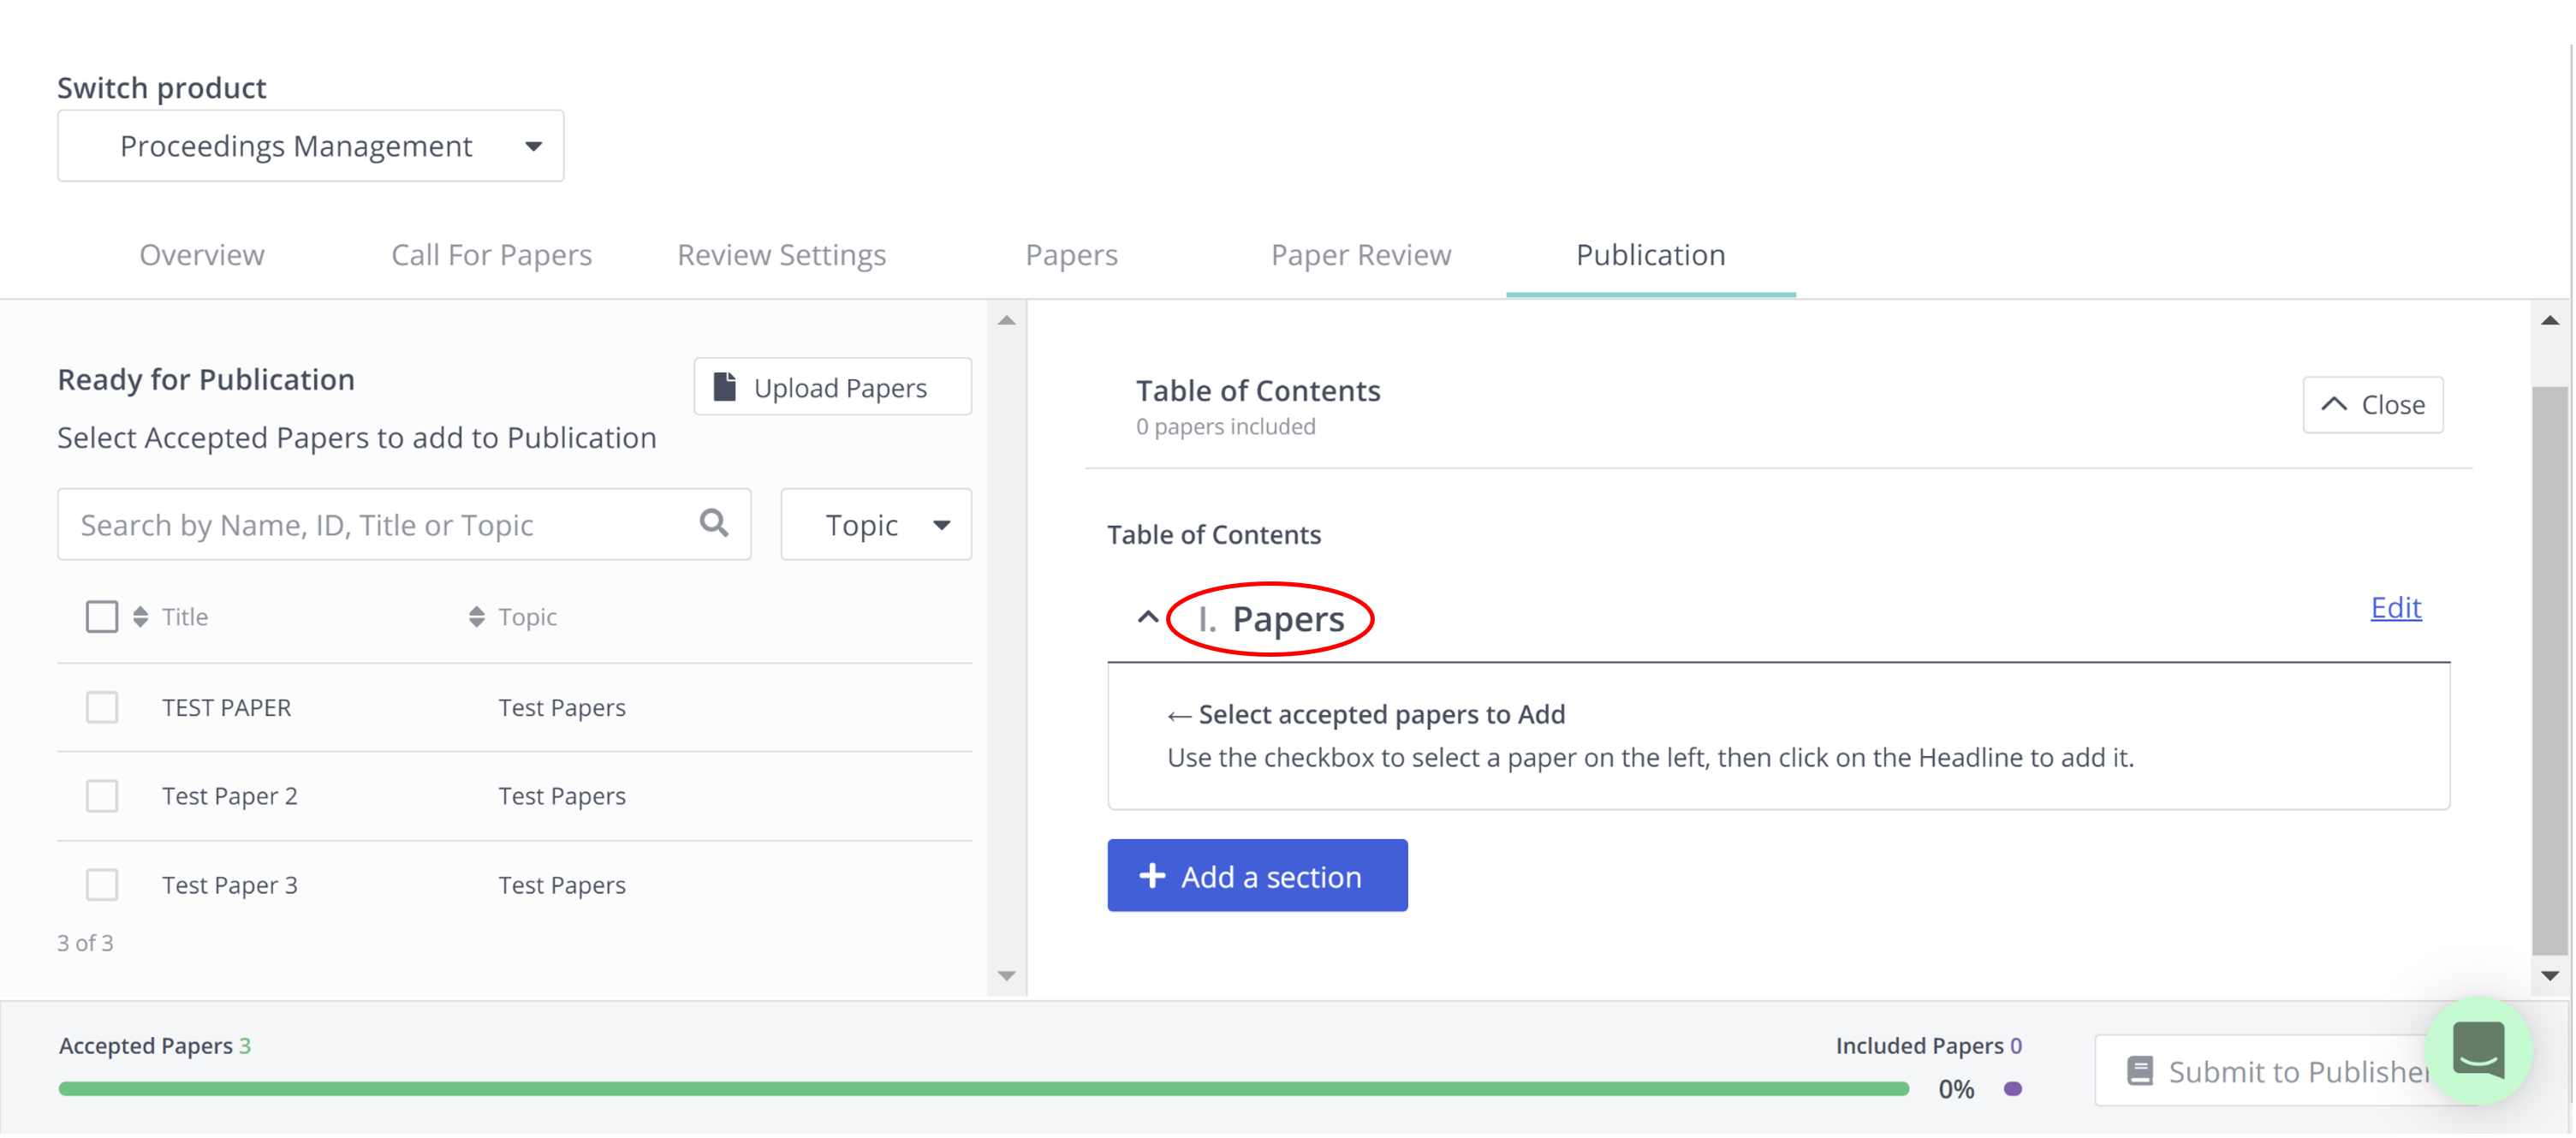
Now you will see the sections you created under Table of Contents.
(In this scenario, there is one section called 'Papers' as there were only three papers submitted and approved for publication.)
Select Papers from the Ready for Publication list to include them in the Table of Contents.
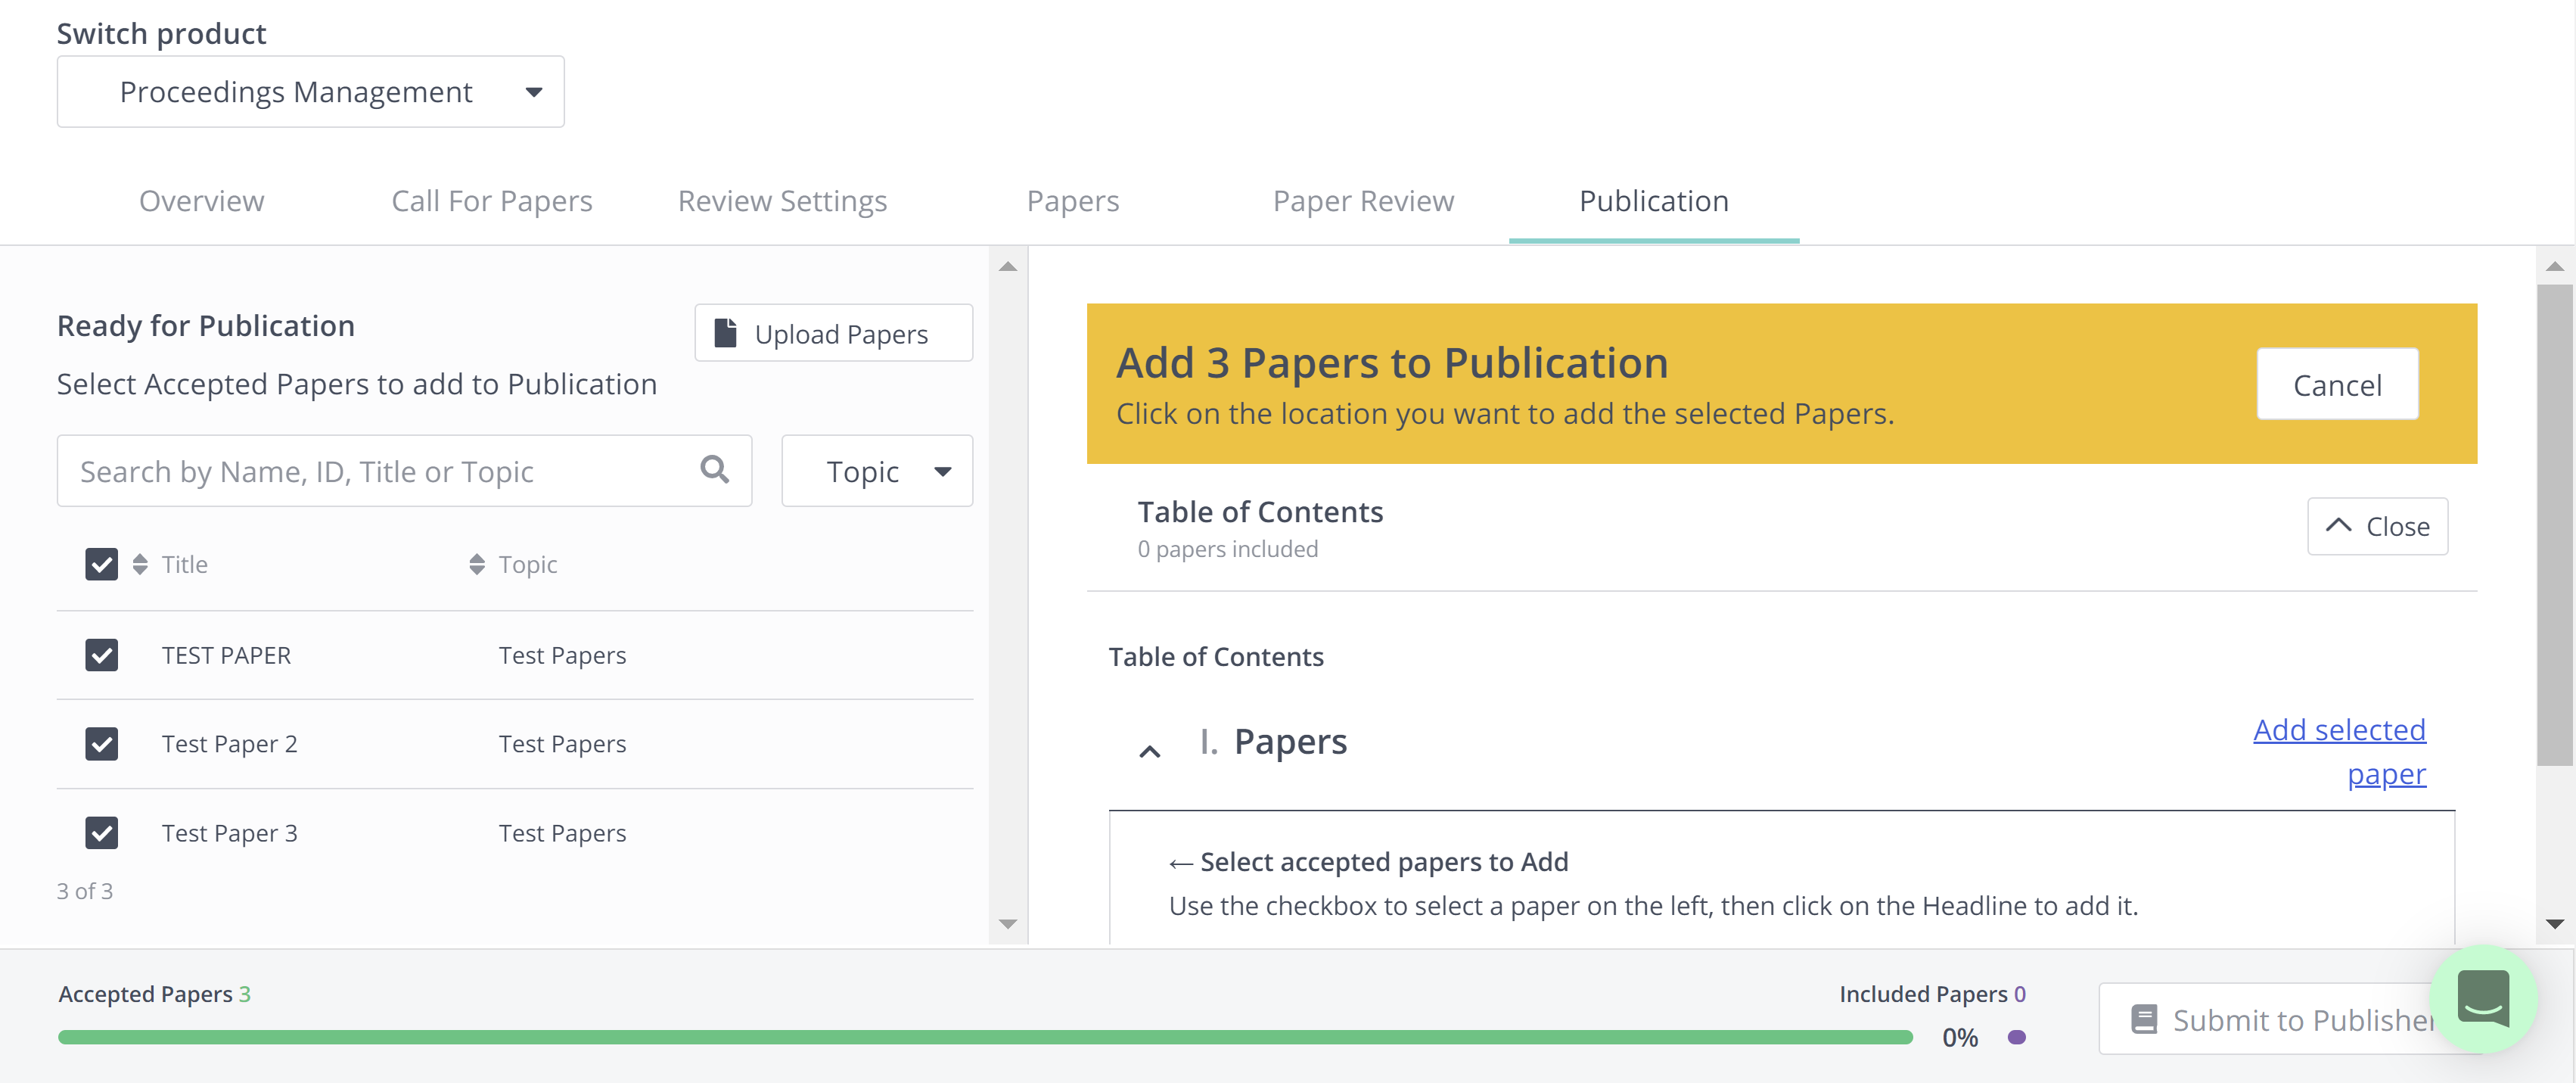
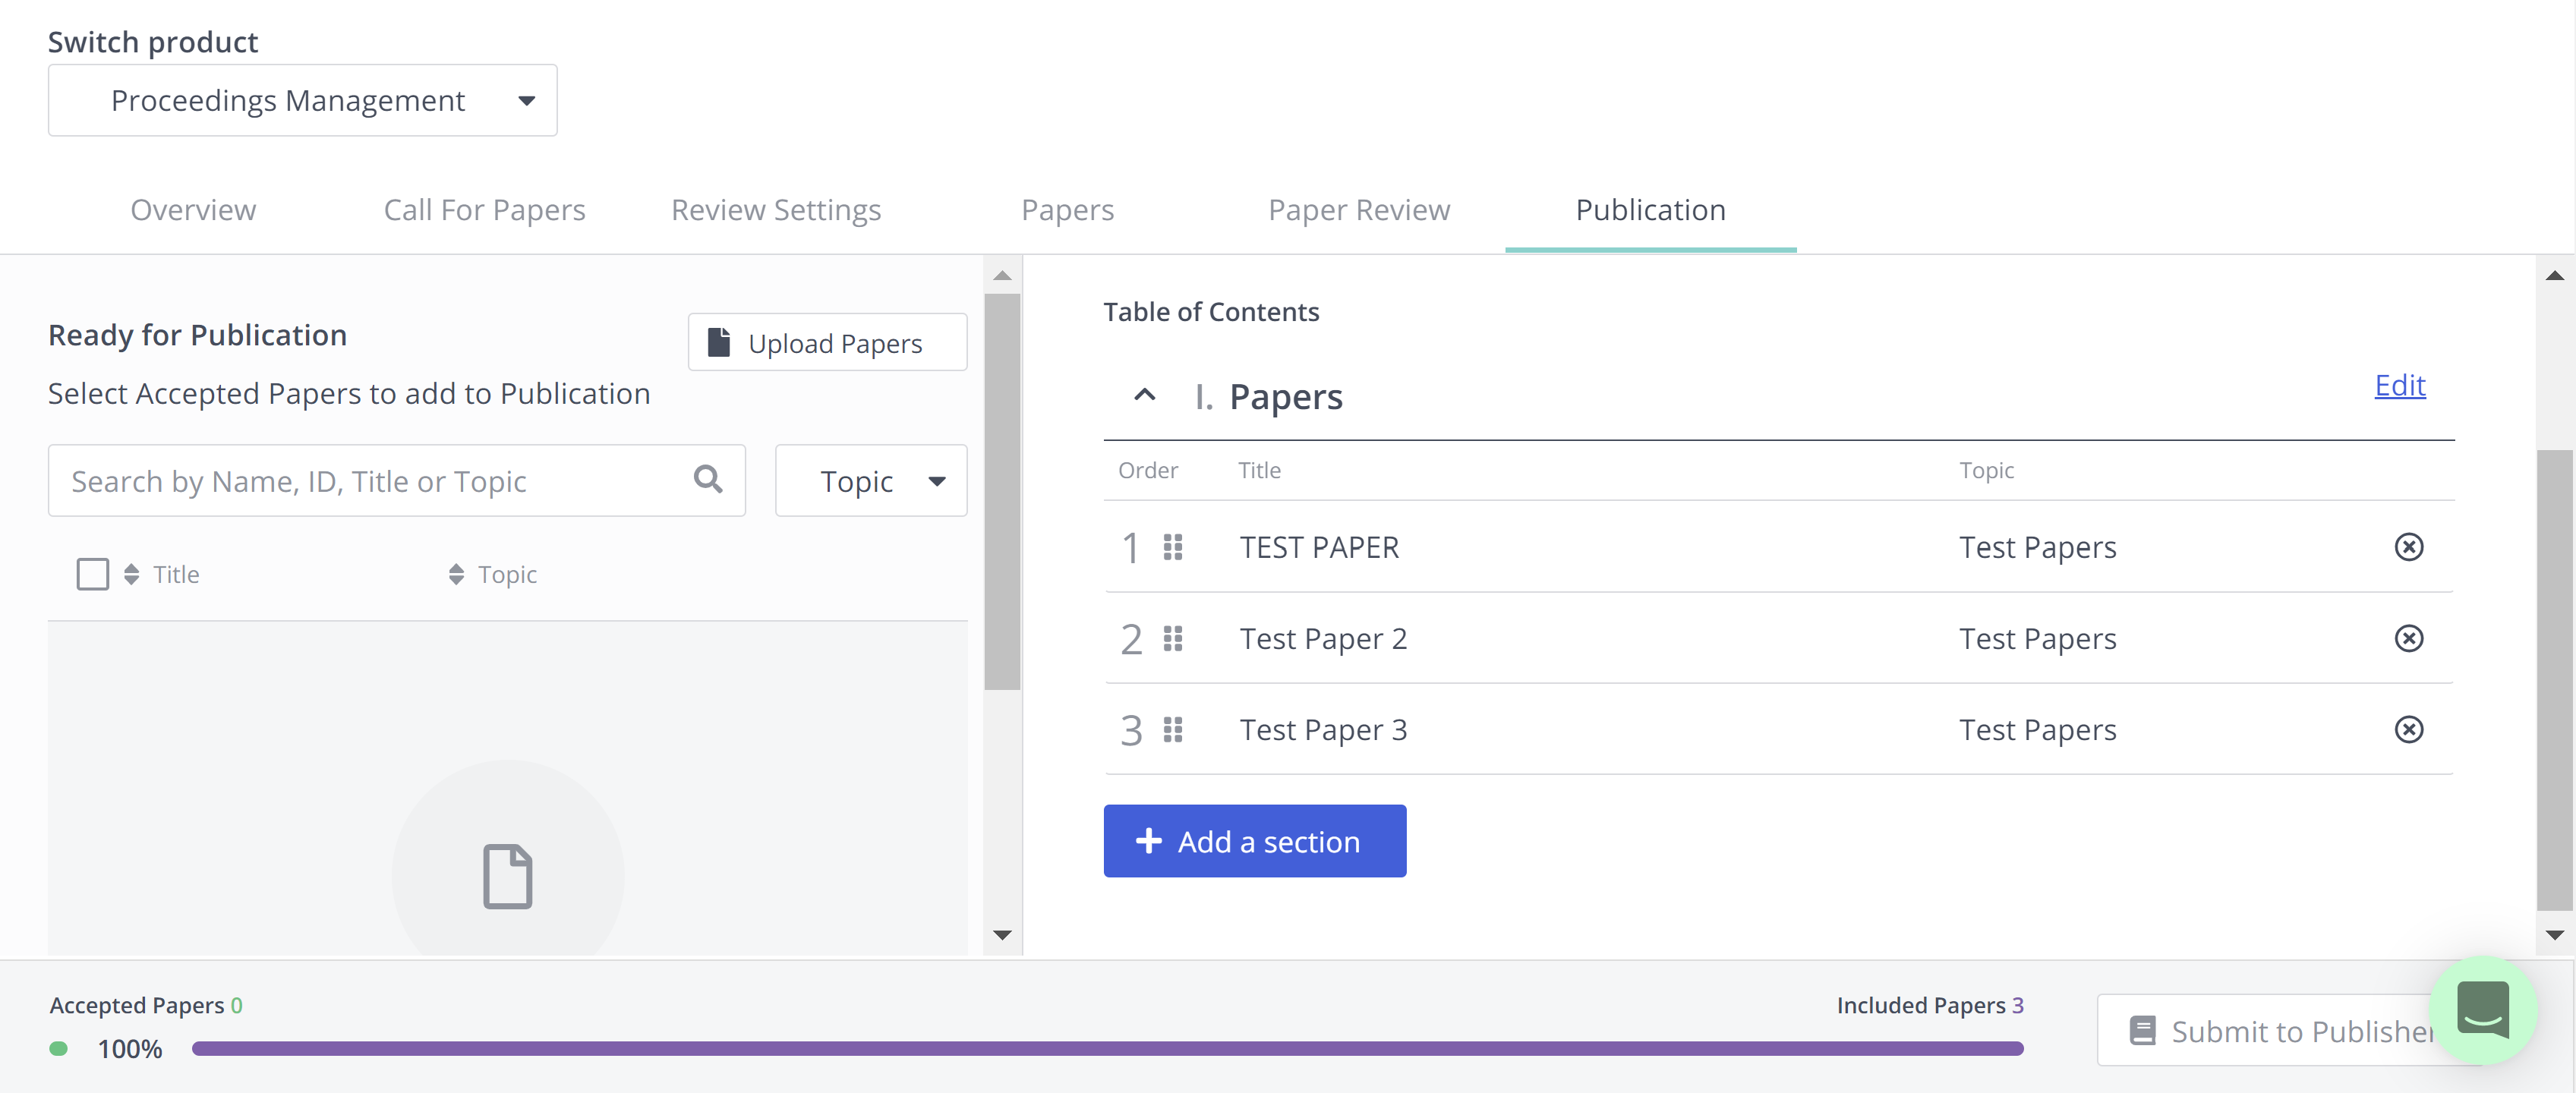
Click on the section you wish to add them to. In this scenario, the three papers have been added to the 'Papers' section, as shown below.
Things to note:
-
All accepted papers [regardless of whether they are just decided or already notified] are listed in the Ready for Publication list.
-
You can select the desired position of a Paper between two existing papers.
-
You can also drag and drop Papers into the desired order after inserting them in the Table of Contents.
-
You can see details of a paper by clicking on the corresponding row in the Ready for Publication list.
-
You can add another section at any point by clicking the blue '+Add a section' button
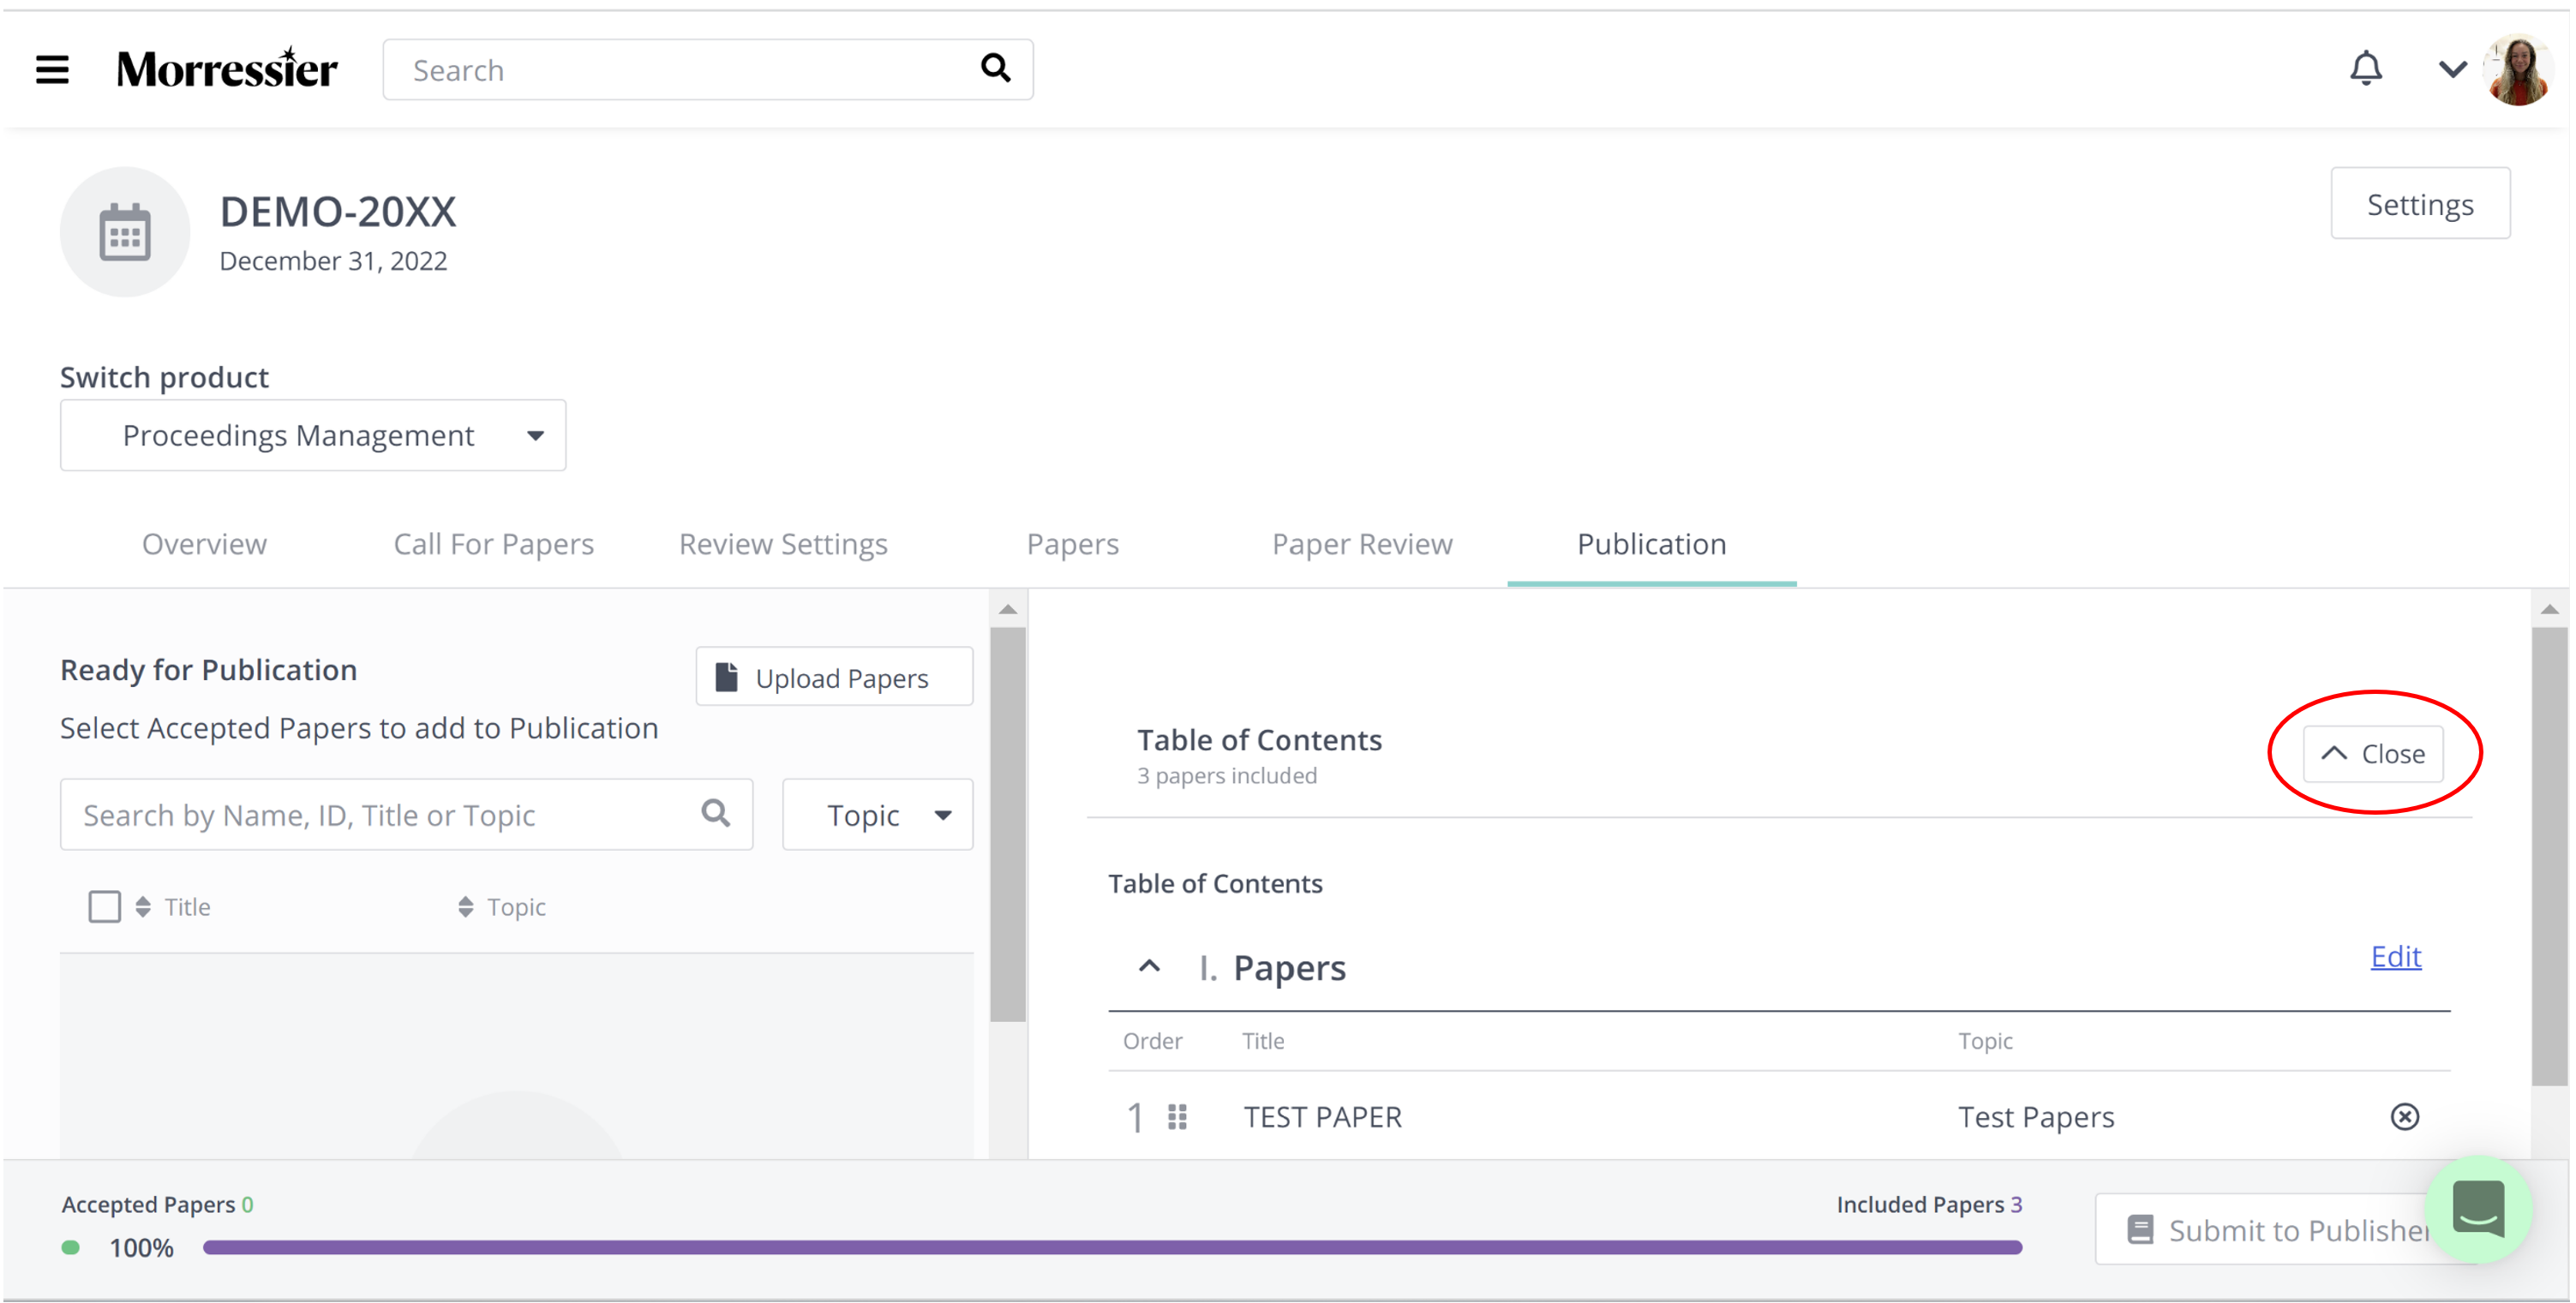
Before your journal is ready for submission to the publishers, you will need to add your Editorial Material and any other additional documents. To do this, close the Table of Contents here:
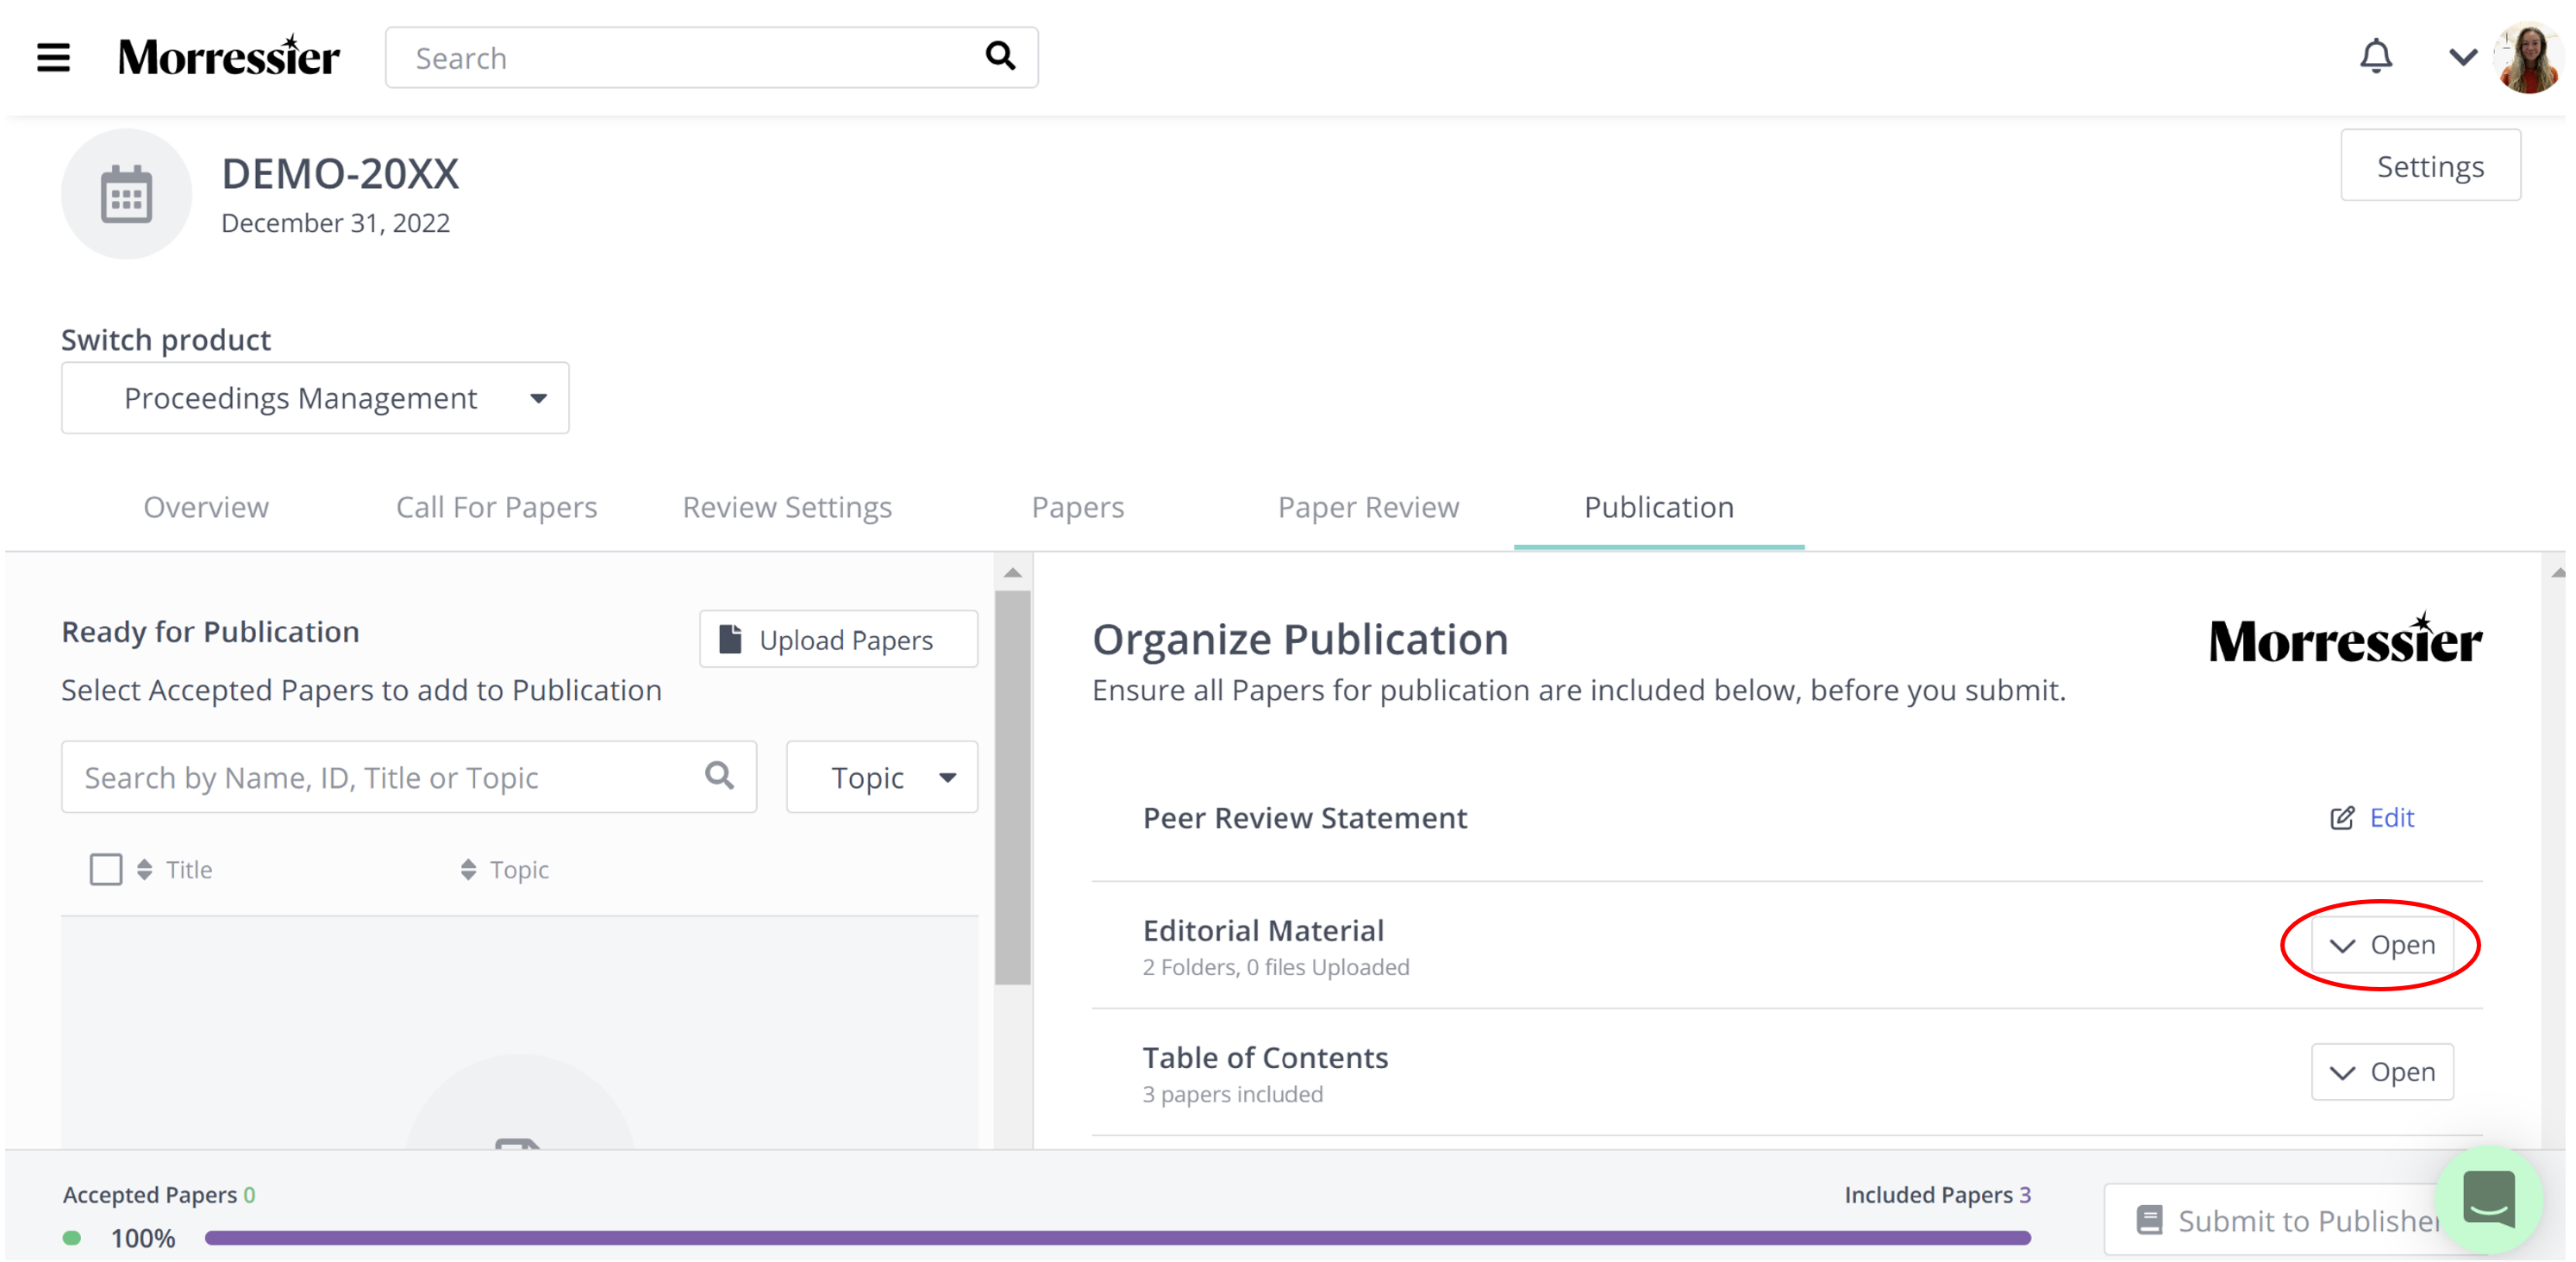
You can then click the drop-down arrow titled 'Open' to upload your supporting documents here:
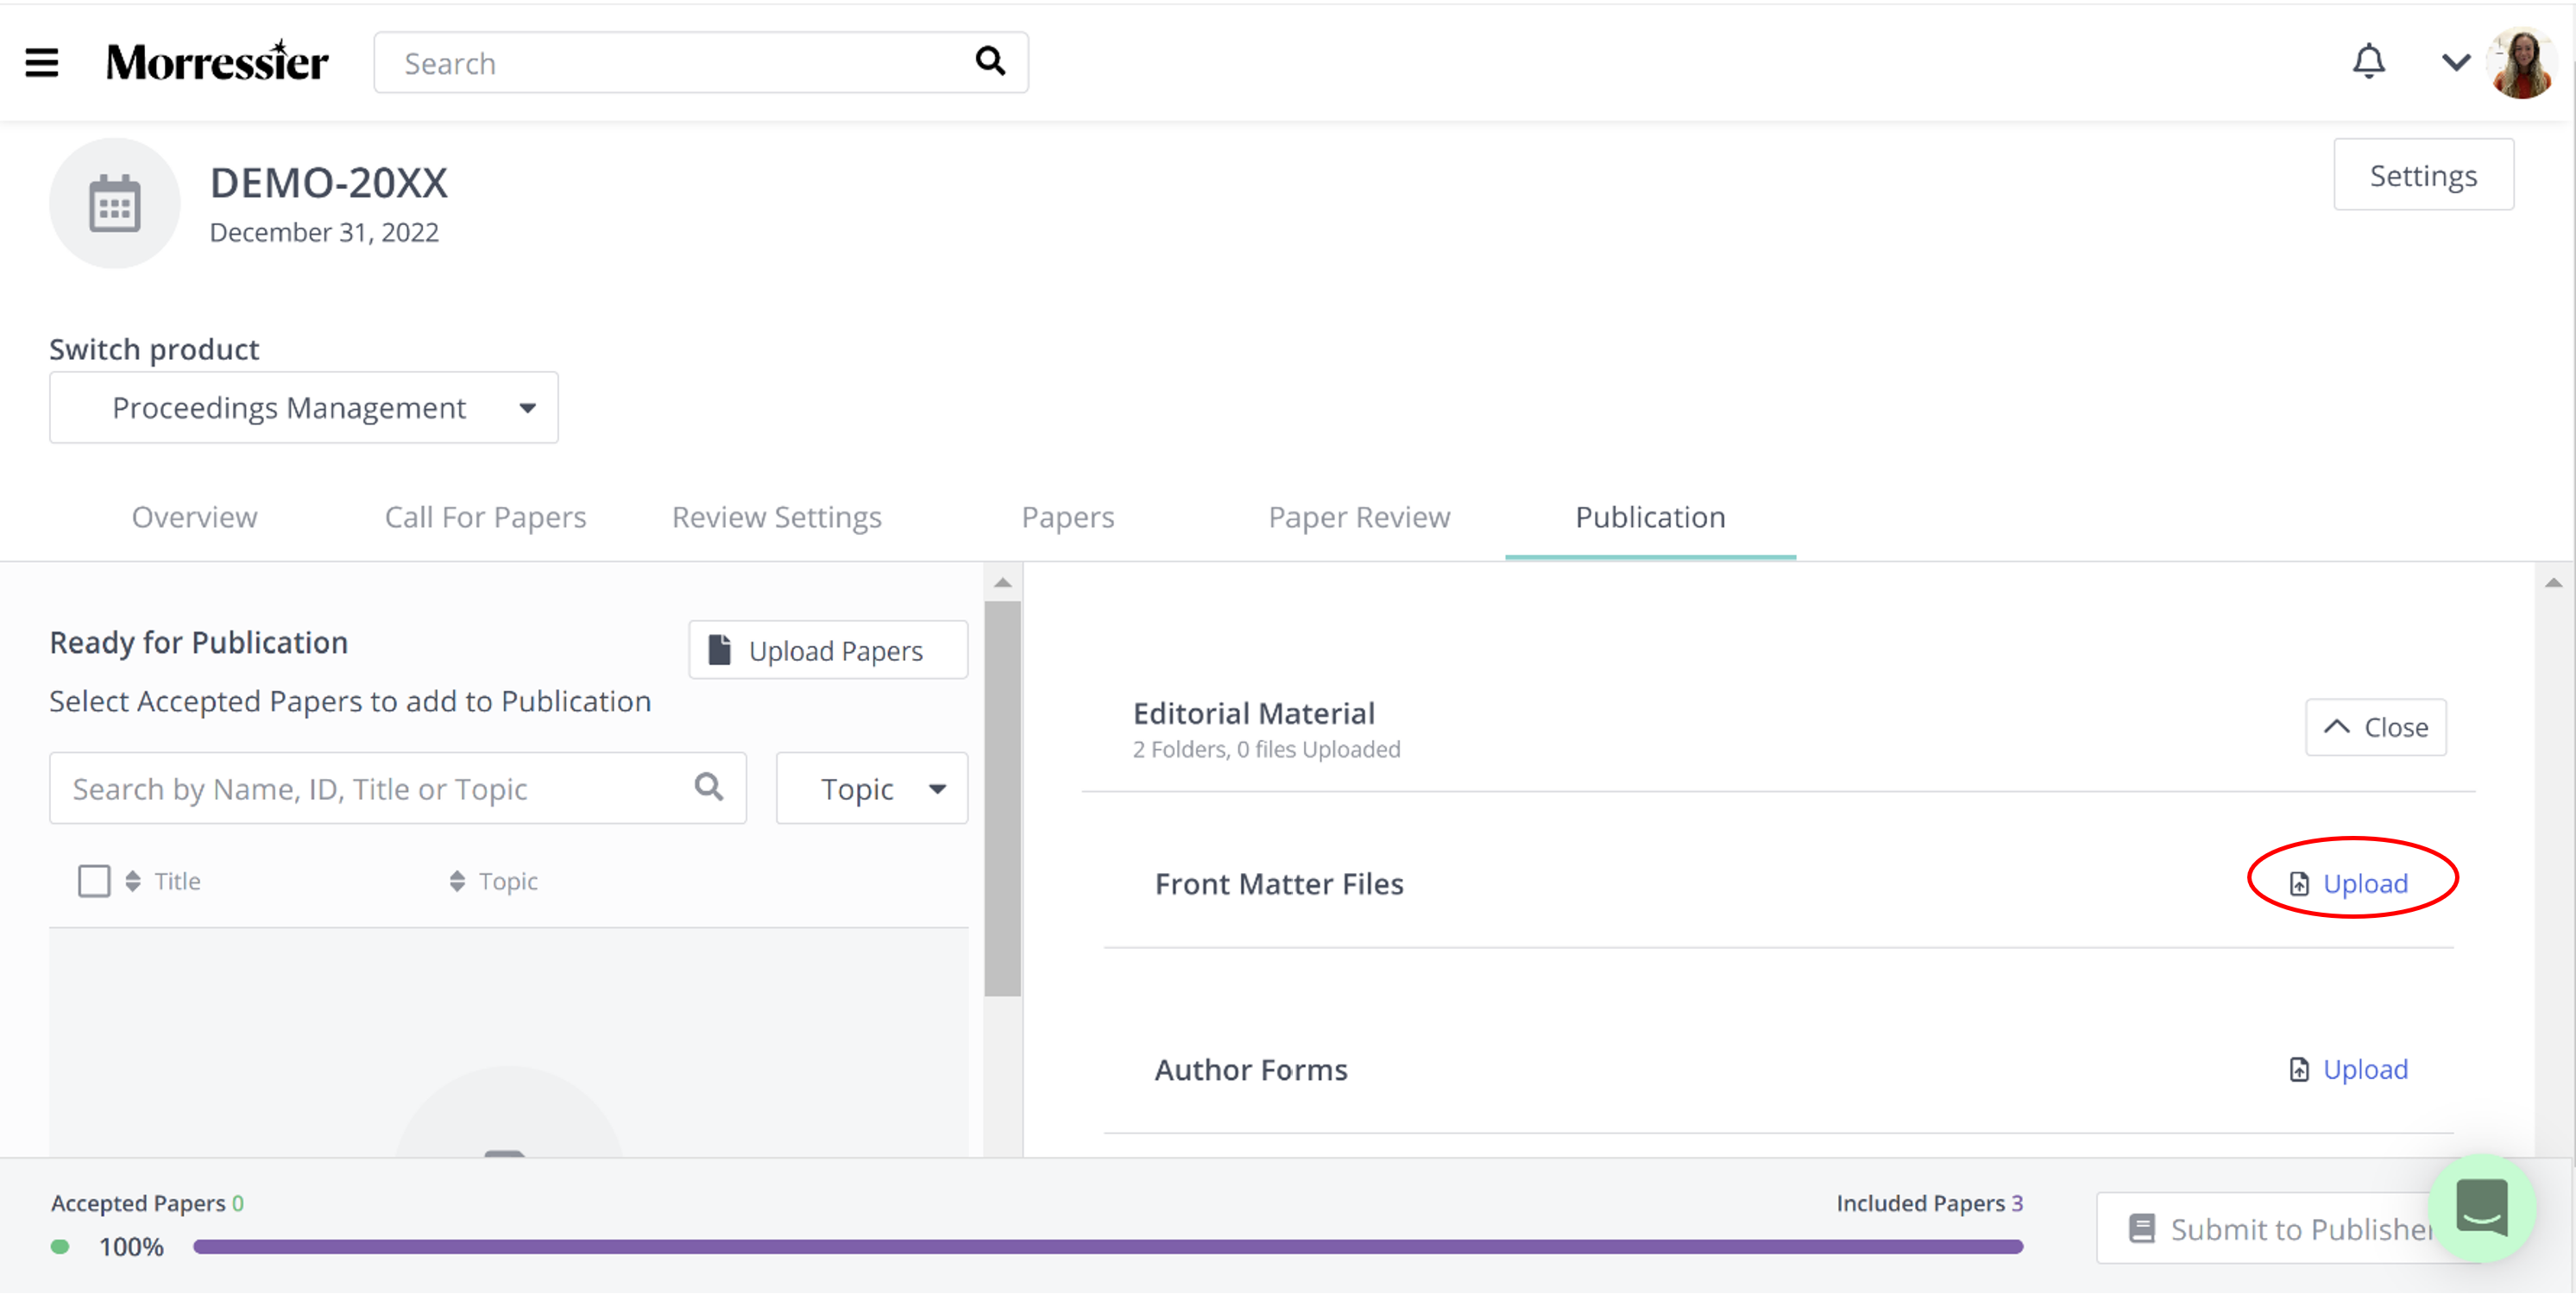
You can upload your Editorial Material by clicking the 'Upload' button next to Front Matter Files.
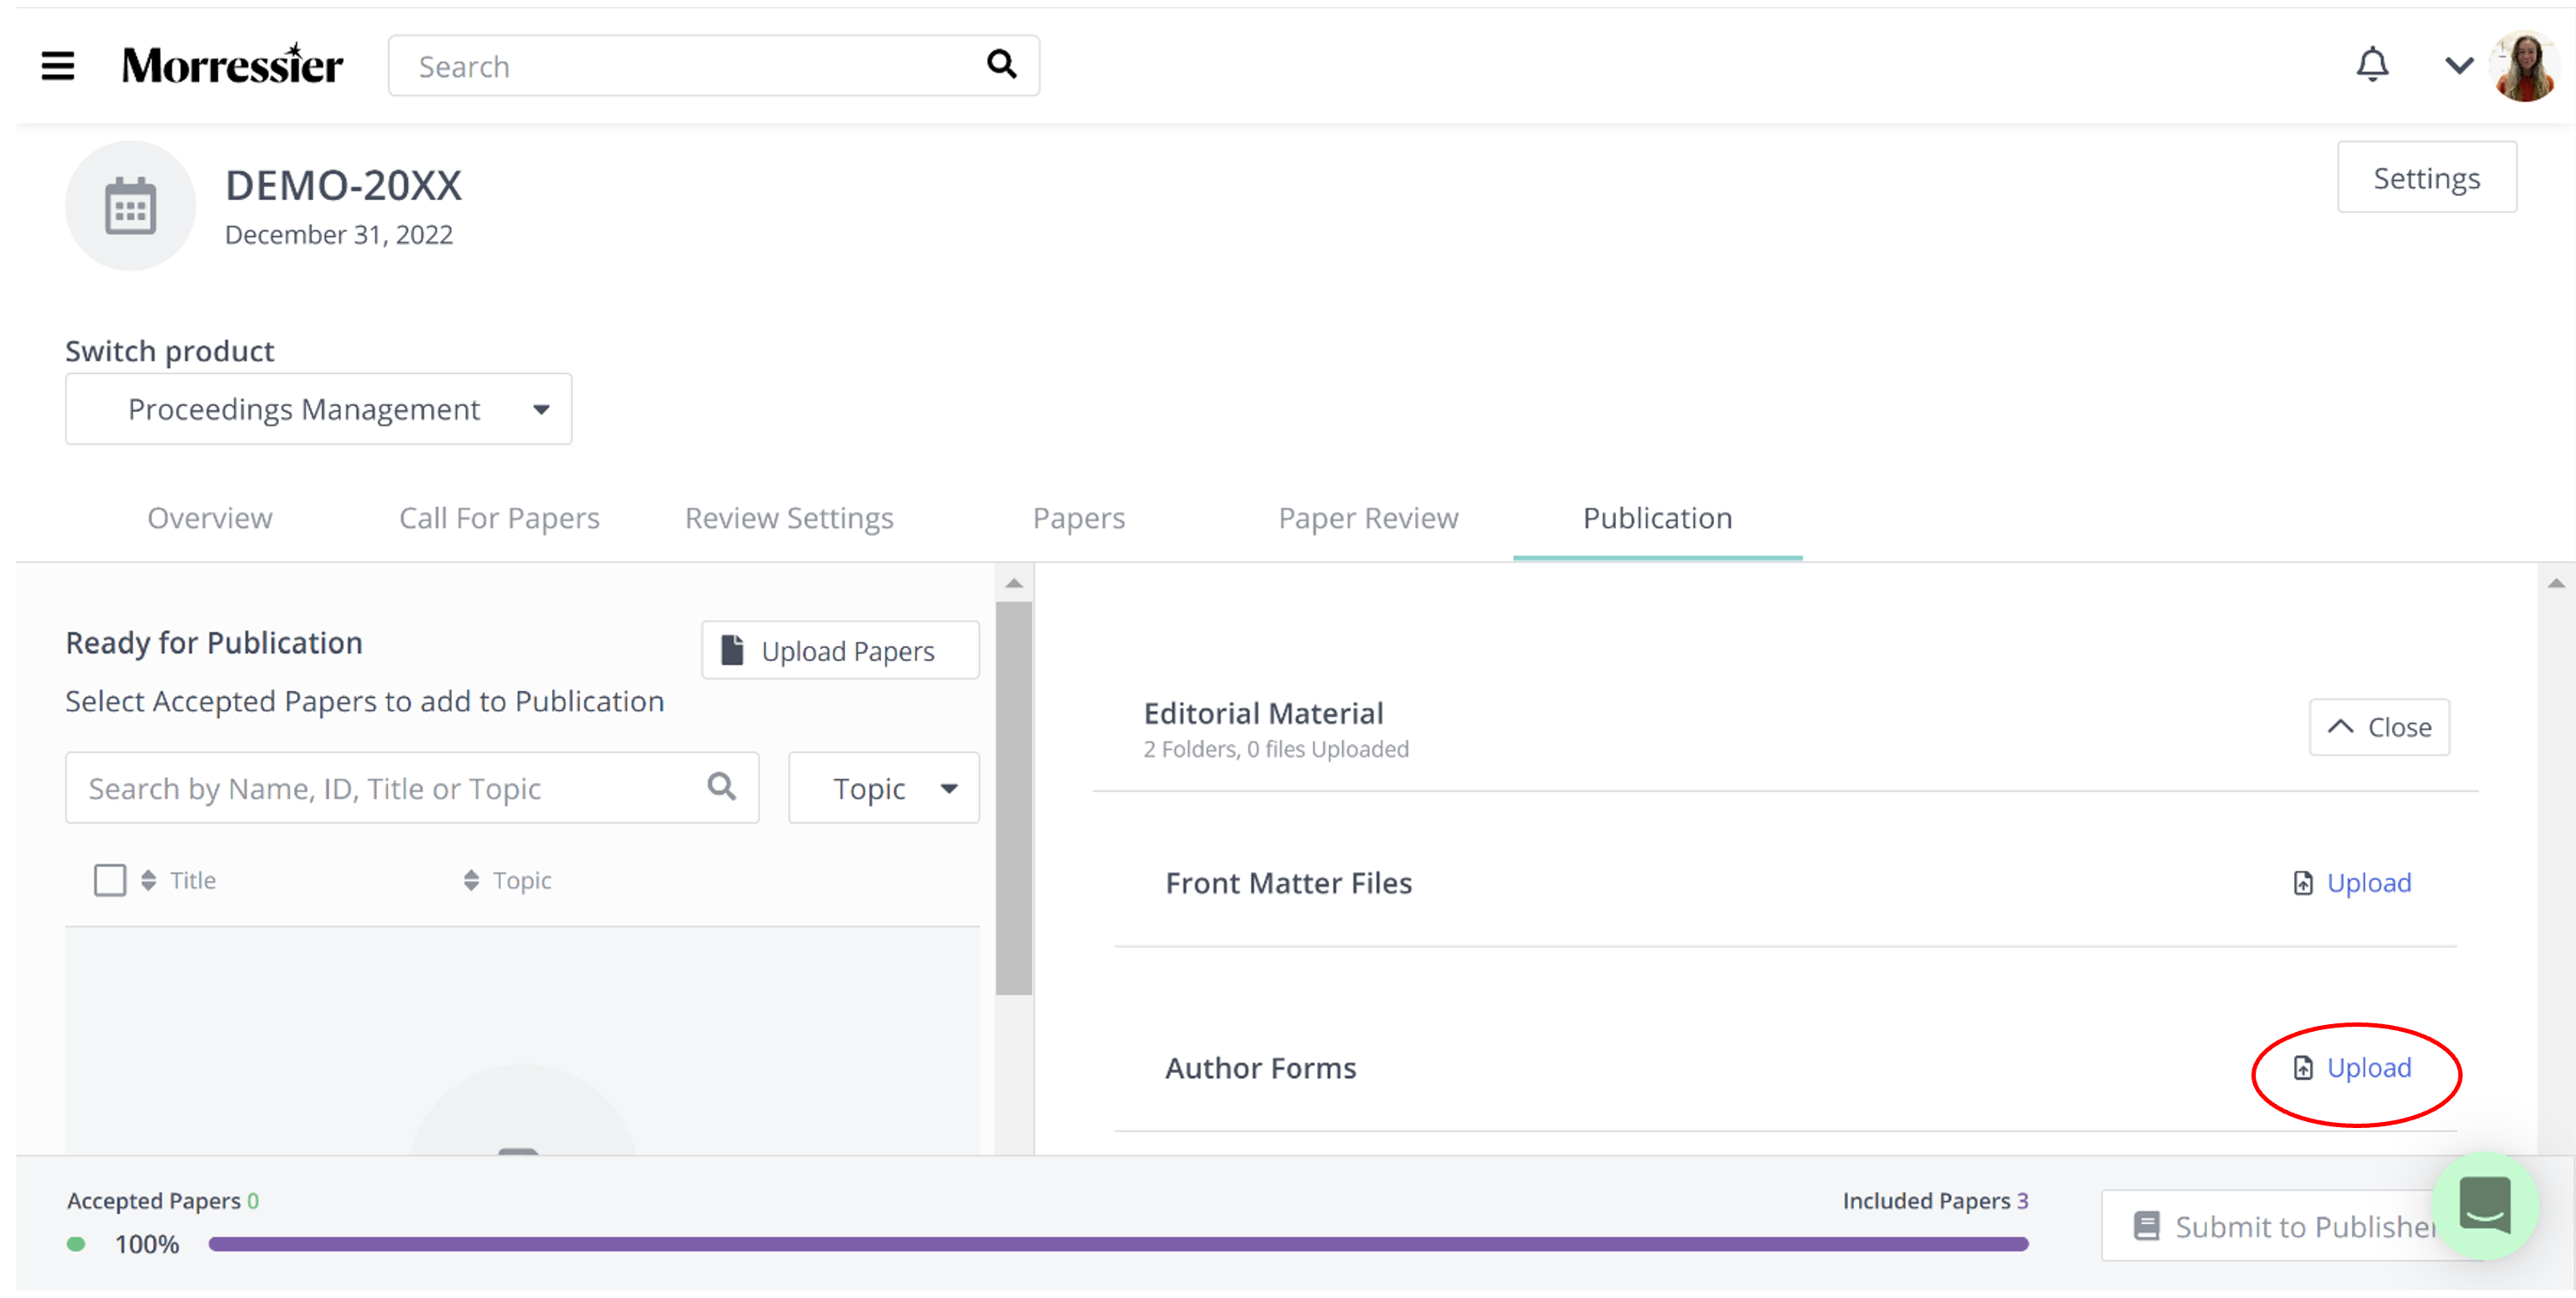
Similarly, you can add your Author Forms by clicking the 'Upload' button here:
NOTE
1- files can be added to the Front Matter Files or Author Forms in any format.
This includes doc (x), xls (x), jpeg and pdf.
2- The Author Forms field is not mandatory, and your proceedings may be submitted without this document. For more information about this, please reach out to the publisher to ask whether or not author forms are required for their publications.
Next click on the Peer Review Statement to check the automatically generated peer review statement and edit any of the numbers calculated by the system, if necessary.
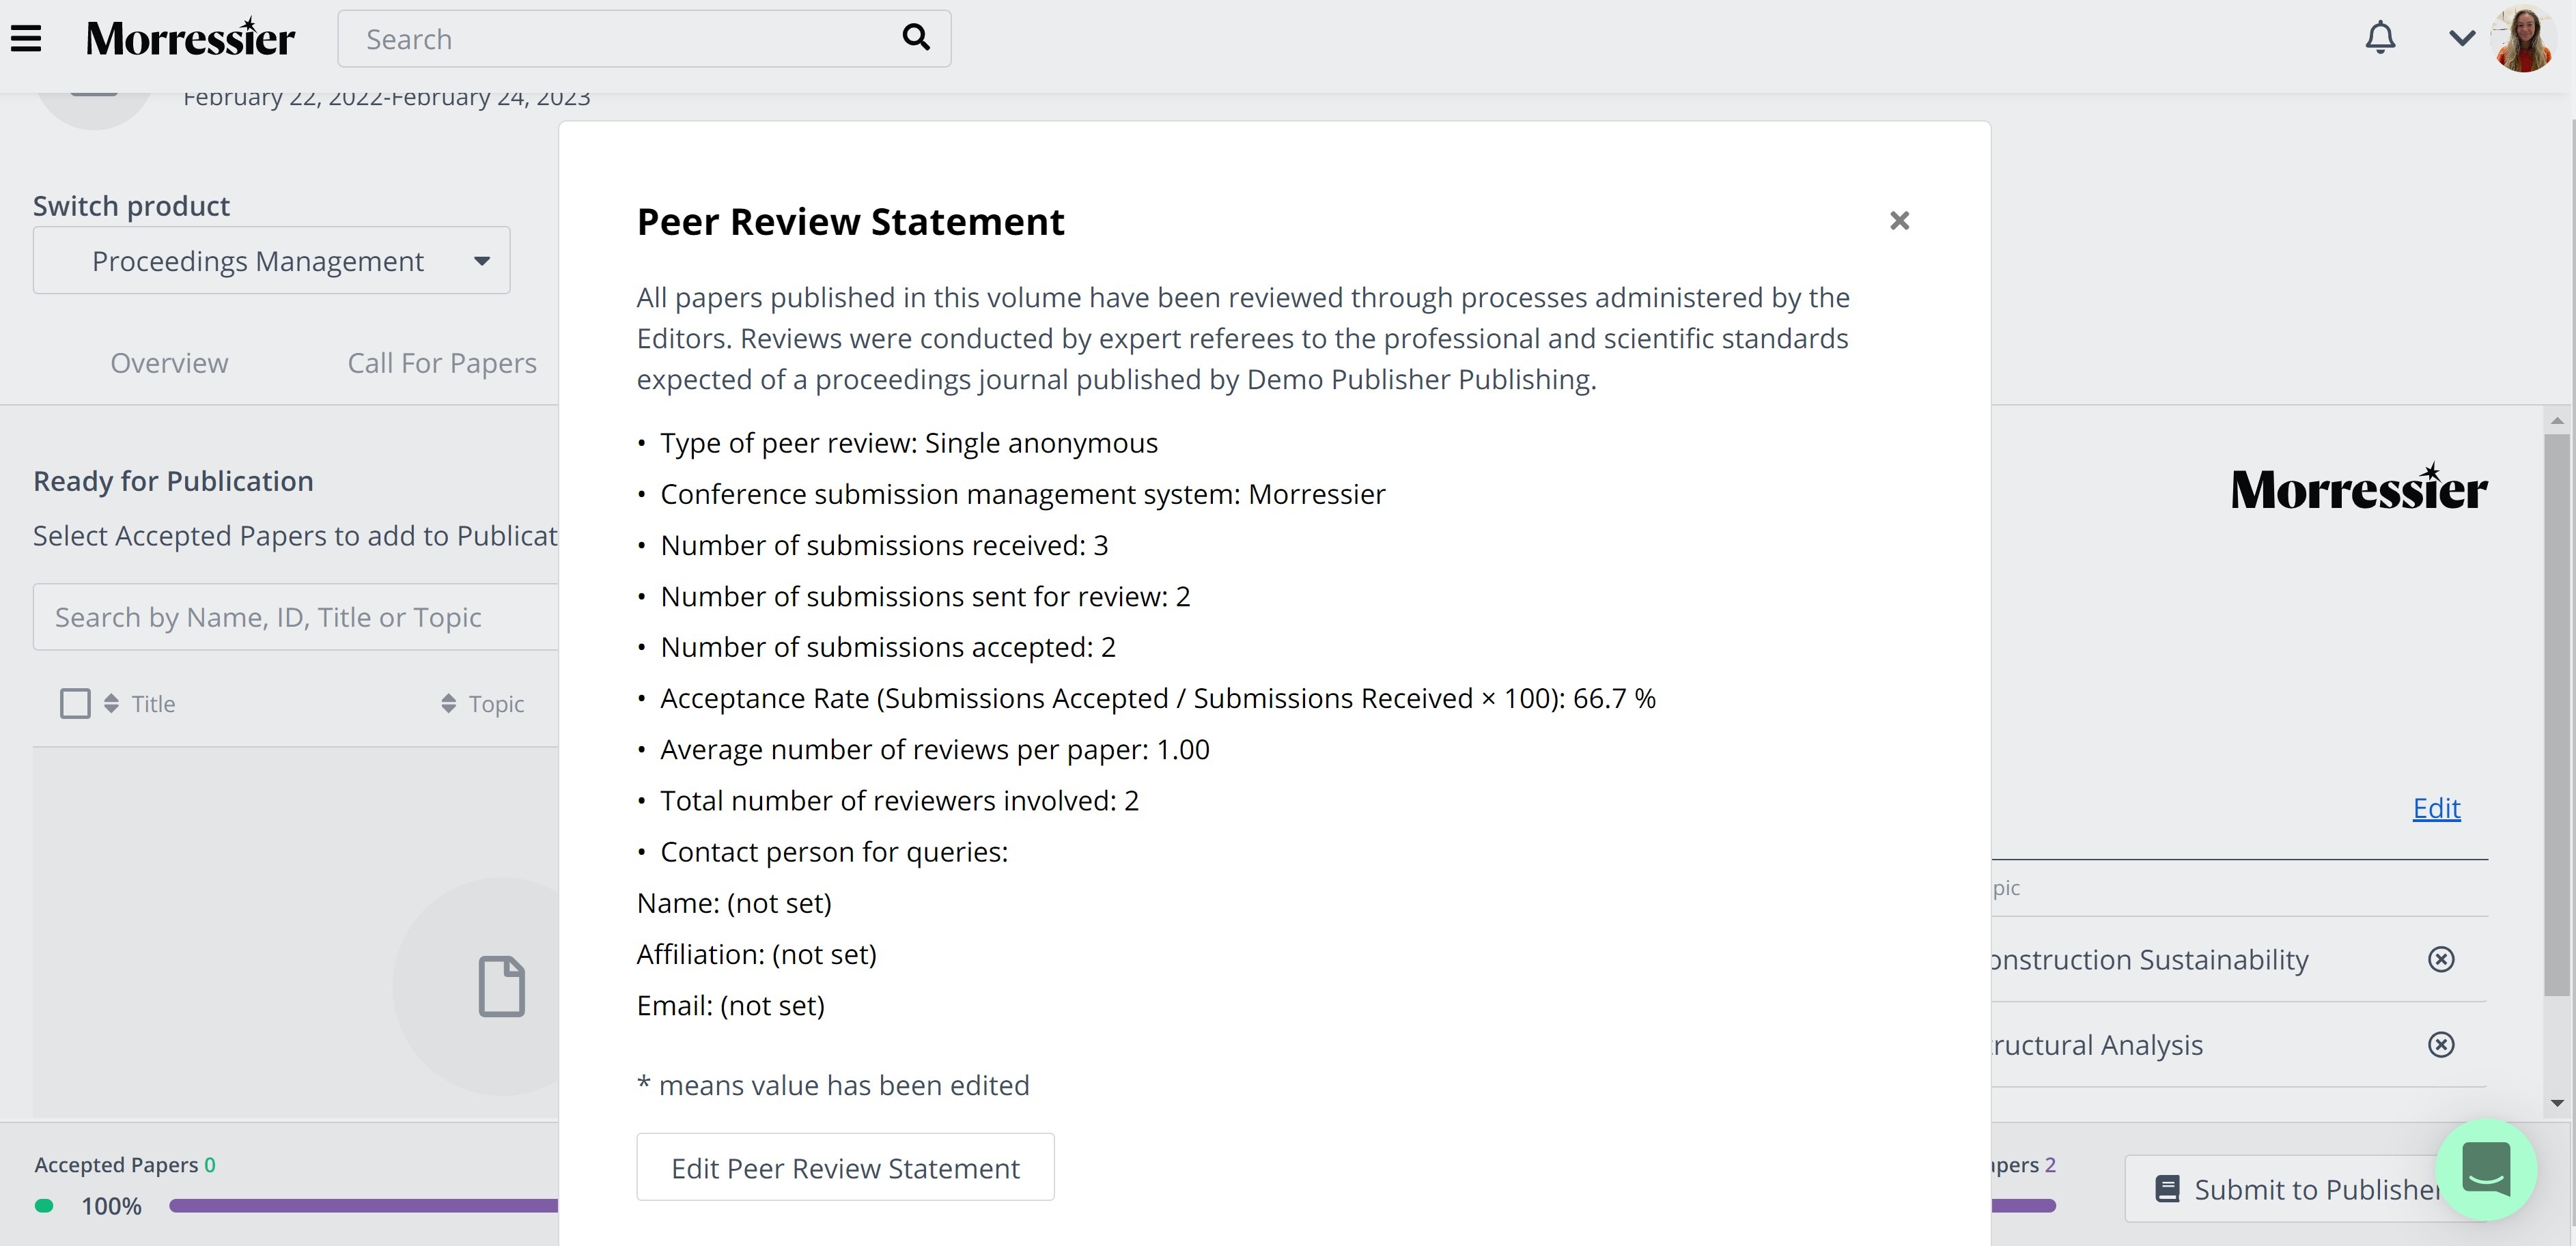
NOTE - the Contact person for queries fields will be automatically populated with the details of the person who submits the Volume to the Publisher if left empty.
You can find further guidance on this accompanying material here.
Once everything is ready, you can click the 'Submit to Publisher' button in the bottom right hand corner:
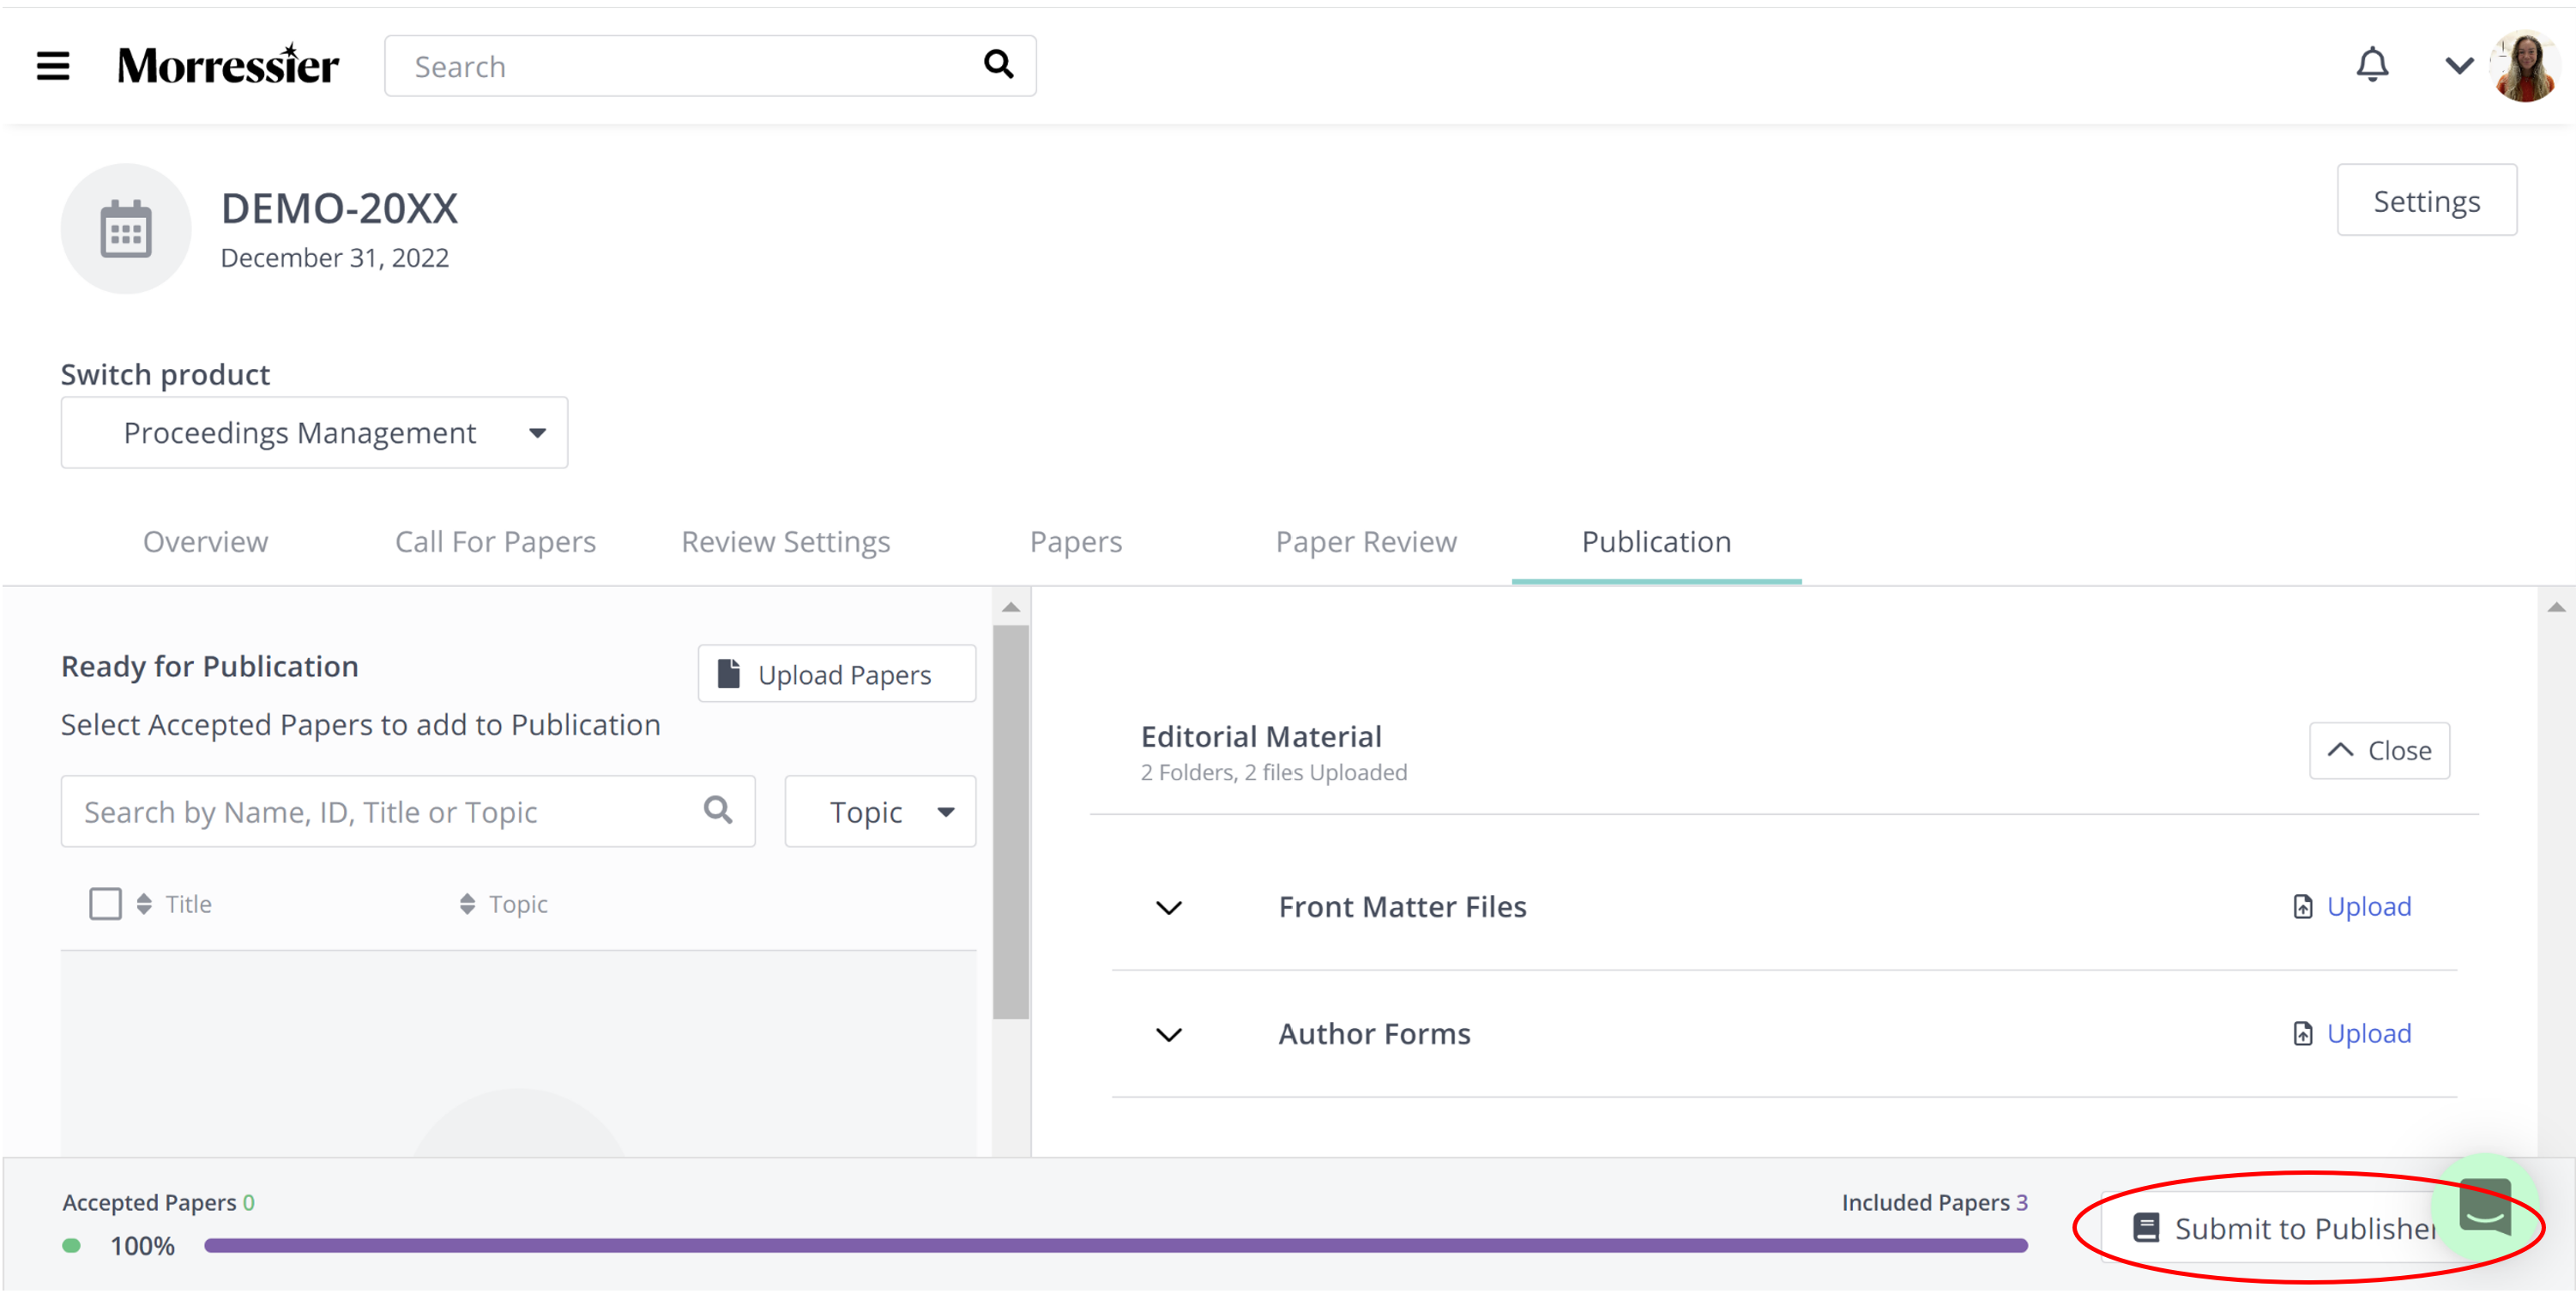
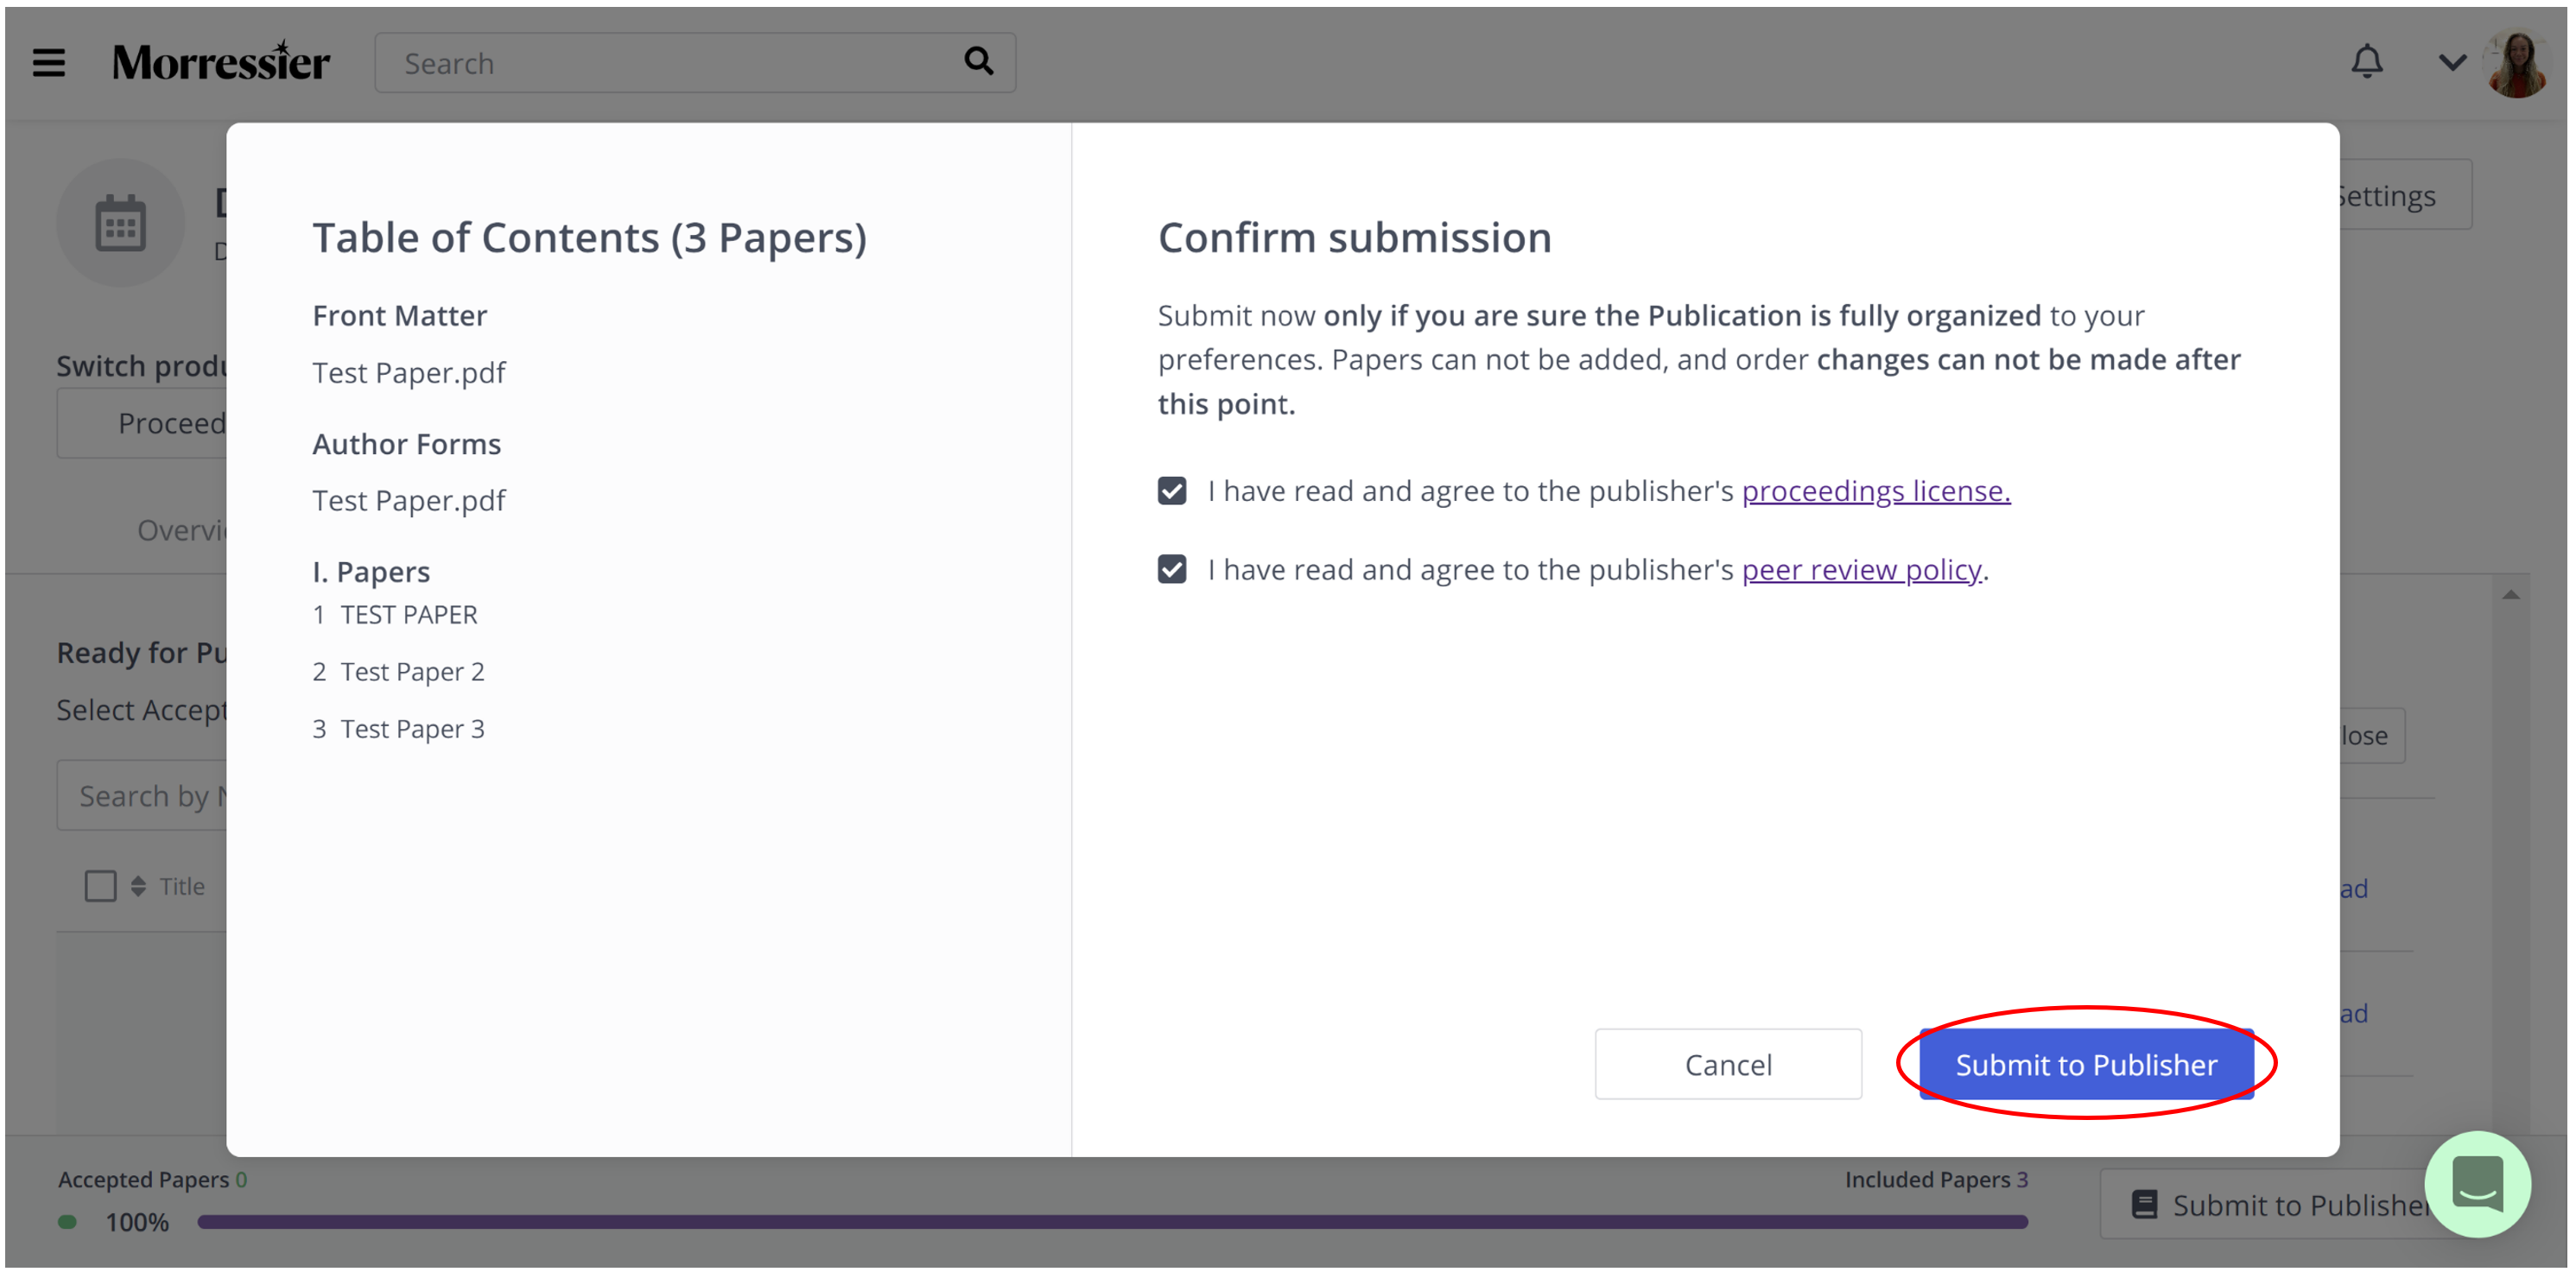
You will be presented with a pop-up box where you will need to select check boxes to confirm you have read and agree to the proceedings licence and peer review policy. You can also read these documents here.
When you are ready, you can click 'Submit to Publisher'.
NOTE:
-
After you have submitted to the Publisher, you will no longer be able to make changes to your content
-
You will be notified when your volume enters the Production process.
-
In the Publication tab, you will be able to see if any Papers were excluded from Publication by the Publisher
-
You will also be able to download a spreadsheet of your Table of Contents and volume details from the Publication tab
If you need further support, please get in touch with us using the chat icon in the bottom right corner or email us at support@morressier.com

